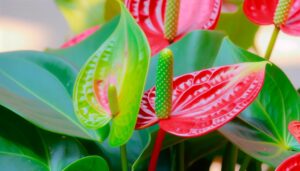
10 Essential Care Tips for Red Anthurium Plant
To care for your red Anthurium, place it in bright, indirect light and avoid direct sunlight. Water deeply but infrequently, letting the top 1-2 inches of soil dry out.
Maintain humidity between 60-80%, using a humidifier or moisture tray if necessary. Use a well-draining soil mix with orchid bark, peat moss, and perlite.
Fertilize every 6-8 weeks with diluted, balanced fertilizer. Trim dead or yellowing leaves to promote new growth and control size with regular pruning.
Monitor for pests like aphids and spider mites. Repot every two years, and guarantee consistent conditions for vibrant blooms.
Discover further insights to enhance your Anthurium's care.
Key Takeaways
- Place in bright, indirect light and avoid direct sunlight.
- Water deeply but allow the top 1-2 inches of soil to dry out.
- Maintain humidity levels between 60-80% using a humidifier or moisture tray.
- Use a well-draining soil mix with orchid bark, peat moss, and perlite.
- Fertilize every 6-8 weeks with a balanced, water-soluble fertilizer diluted to half strength.
Optimal Light Conditions
To secure the thriving of your Red Anthurium, place it in a location where it receives bright, indirect light. Direct sunlight can scorch its leaves, so avoid placing it in windows with intense sun exposure. Instead, choose spots with filtered light or use sheer curtains to diffuse sunlight.
Maintaining ideal light conditions ensures strong growth and vibrant blooms. If natural light is insufficient, you can use artificial grow lights to supplement. Keep in mind that the plant's light requirements may vary with seasonal changes; adjust its position as needed to maintain consistent light exposure.
Proper Watering Techniques
Ensuring your Red Anthurium receives the appropriate amount of water is essential for its health and longevity. Water your Anthurium deeply but infrequently, allowing the top 1-2 inches of soil to dry out between waterings.
Use room-temperature water and make sure it drains well to prevent root rot. A well-draining potting mix, such as a combination of orchid bark, peat, and perlite, helps in avoiding waterlogging. Avoid letting the plant remain in water; empty the saucer beneath the pot after watering.
During the growing season, typically spring and summer, water more often. Reduce watering in fall and winter when growth slows down. Always check soil moisture before watering to prevent excessive watering, which can result in yellowing leaves and other health problems.
Ideal Humidity Levels
Maintaining high moisture levels, ideally between 60-80%, is essential for the thriving growth of your Red Anthurium. You can achieve this by using a humidifier or placing your plant on a moisture tray filled with water and pebbles. Regularly misting the leaves can also help, but avoid waterlogging the soil. Monitor moisture levels with a hygrometer to guarantee consistency.
Here's a quick reference table to help you manage moisture:
| Method | Description | Frequency |
|---|---|---|
| Humidifier | Provides consistent moisture | Daily |
| Moisture Tray | Water and pebbles elevate moisture | Check weekly |
| Misting | Sprays water on leaves | Every other day |
| Bathroom Placement | Natural moisture from showers | As needed |
| Hygrometer Use | Measures moisture levels | Daily |
Guaranteeing your Red Anthurium has the right moisture will promote lush, vibrant growth.
Best Soil Mix
For best growth, you should use a well-draining soil mix rich in organic matter for your Red Anthurium. Ensuring the soil has the right composition prevents root rot and promotes healthy root development.
Aim for a pH level between 5.5 and 6.5 to create the ideal environment for nutrient absorption.
Well-Draining Soil Composition
To achieve top growth for your red anthurium plant, you should use a well-draining soil mix composed of equal parts orchid bark, peat moss, and perlite. This combination guarantees that excess water drains away quickly, preventing root rot and other moisture-related issues.
Orchid bark provides structure and aeration, allowing roots to breathe. Peat moss retains sufficient moisture without becoming waterlogged, promoting healthy root development. Perlite, a lightweight volcanic rock, improves drainage and aeration further. Mix these components thoroughly before potting your anthurium.
Make sure the pot has drainage holes to facilitate water flow. Regularly check soil moisture, and water only when the top inch feels dry. This specialized soil mix creates an ideal environment for robust growth and vibrant blooms.
Organic Matter Importance
Incorporating organic matter into your soil mix greatly enhances nutrient availability and moisture retention for your red anthurium plant. You should aim to create a balanced blend that supports root health and robust growth. Organic matter decomposes slowly, providing a continuous nutrient supply.
Consider the following components:
- Composted bark: Improves aeration and drainage while adding essential nutrients.
- Peat moss: Retains moisture effectively, preventing soil from drying out too quickly.
- Perlite: Guarantees excellent drainage and prevents soil compaction.
- Coconut coir: A sustainable option that retains moisture and promotes healthy root development.
- Worm castings: Rich in beneficial microorganisms, enhancing soil structure and fertility.
Ideal Ph Levels
Ensuring your red anthurium plant thrives requires maintaining an ideal soil pH level between 5.5 and 6.5, which promotes best nutrient uptake and root health. You'll want to use a well-draining soil mix to achieve this. Consider combining peat moss, pine bark, and perlite to create an excellent environment. Here's a recommended soil mix:
| Component | Ratio |
|---|---|
| Peat Moss | 50% |
| Pine Bark | 30% |
| Perlite | 20% |
Peat moss helps retain moisture while maintaining acidity. Pine bark provides aeration and organic matter, enhancing root growth. Perlite improves drainage, preventing waterlogging. Regularly check your soil's pH using a pH meter or test kit, adjusting with pH up or down solutions as necessary to keep your plant healthy.
Fertilization Schedule
Anthurium plants thrive when you fertilize them every six to eight weeks with a balanced, water-soluble fertilizer diluted to half strength. This guarantees they receive the necessary nutrients without risking root burn. Consistent fertilization promotes vibrant blooms and lush foliage.
Here's what to remember:
- Measure accurately: Use a measuring spoon to guarantee the fertilizer is diluted correctly.
- Apply evenly: Pour the solution around the base, avoiding direct contact with leaves.
- Water before fertilizing: Moist soil helps distribute nutrients more effectively.
- Monitor plant response: Adjust frequency if you notice yellowing leaves or stunted growth.
- Seasonal adjustment: Reduce fertilization during the winter months when growth slows down.
Temperature Requirements
Maintaining the ideal temperature range of 65-80°F is vital for your red Anthurium plant's health and growth. You should guarantee consistent temperature control, avoiding any sudden drops below 60°F, which could stress the plant. High temperatures over 90°F can also cause damage, leading to wilting and poor growth. Placing your Anthurium in a well-ventilated area helps maintain optimal conditions. Additionally, you should monitor the humidity levels, as they play an essential role in temperature regulation.
Here's a quick reference table for temperature requirements:
| Temperature (°F) | Condition | Effect on Plant |
|---|---|---|
| 65-80 | Ideal | Best growth and health |
| Below 60 | Too Cold | Stressed, potential damage |
| Over 90 | Too Hot | Wilting, poor growth |
Carefully managing these factors will ensure your red Anthurium thrives.
Pruning and Trimming
Pruning your red anthurium involves removing dead leaves to maintain plant health and aesthetics.
Regular trimming encourages new growth by redirecting energy to healthy parts of the plant.
Additionally, controlling the plant size through careful trimming prevents overcrowding and promotes ideal air circulation.
Remove Dead Leaves
To secure your red anthurium plant thrives, regularly trim away dead leaves using sterilized pruning shears to prevent disease and encourage new growth. Removing dead leaves not only enhances the plant's appearance but also maintains its overall health.
Use the following steps to ensure an effective pruning process:
- Inspect: Check for yellowing or browning leaves regularly.
- Sterilize: Clean your pruning shears with rubbing alcohol before use.
- Cut Close: Trim the dead leaves close to the base without damaging healthy tissue.
- Dispose Properly: Discard the removed leaves away from the plant to avoid pest attraction.
- Monitor: Keep an eye on the plant post-trimming for any signs of distress or disease.
Encourage New Growth
Regularly trimming your red anthurium plant stimulates vigorous new growth and enhances its overall health. Start by identifying any yellowing or damaged leaves, as well as faded flowers. Use sterilized, sharp scissors to cut these off at the base. This practice not only promotes new leaf and flower production but also prevents disease. Focus on areas where growth appears sluggish, selectively removing older growth to allow light and air to reach the plant's center.
| Action | Tool Needed | Frequency |
|---|---|---|
| Remove Dead Leaves | Sterilized Scissors | Bi-weekly |
| Trim Faded Flowers | Sharp Pruning Shears | Monthly |
| Cut Back Old Growth | Clean Pruners | Seasonal |
Control Plant Size
Maintaining ideal plant size guarantees your red anthurium remains manageable and continues to thrive in its environment. Regular pruning and trimming are essential to control growth and promote overall health.
Start by using disinfected pruning shears to prevent disease. Trim back any dead or injured leaves at the bottom to encourage new growth. Clip any excessively long stems to maintain a compact shape.
- Disinfected pruning shears: Prevents disease transmission.
- Bottom cutting: Removes dead or damaged leaves.
- Stem clipping: Keeps plant compact.
- Regular intervals: Ensure consistent growth control.
- Disposal of trimmings: Prevents pest infestation.
Pest Control
Effective pest control for your Red Anthurium plant involves identifying common pests like aphids, spider mites, and mealybugs, and using appropriate treatments to eliminate them.
Inspect your plant regularly, focusing on the undersides of leaves and stems where pests often hide. If you spot aphids, a solution of water and mild soap can help remove them.
For spider mites, increase humidity and use insecticidal soap. Mealybugs can be treated by applying rubbing alcohol with a cotton swab to affected areas.
Make sure you isolate infested plants to prevent the pests from spreading. Regularly wiping the leaves with a damp cloth can also deter pests and keep your plant healthy.
Always follow the guidance on any pest control products you use.
Repotting Guidelines
When repotting your red anthurium, choose a pot that provides sufficient drainage to prevent waterlogging.
Opt for a soil mix that combines peat, pine bark, and perlite to mimic its natural habitat.
Guarantee the new pot is only one size larger to avoid excessive space that can retain too much moisture.
Choosing Right Pot
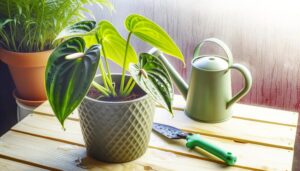
To maximize growth for your red anthurium, selecting a pot with sufficient drainage and the appropriate size is essential when repotting. Choose a pot that's just one size larger than the current one to avoid excessive soil that retains too much moisture. Confirm the pot has drainage holes to prevent waterlogging, which can lead to root rot.
Consider these factors:
- Material: Terracotta pots offer better breathability, while plastic retains moisture longer.
- Shape: A slightly wider pot helps accommodate the root spread.
- Depth: Verify it's deep enough to support the root system but not excessively tall.
- Placement: Use a saucer to catch excess water.
- Weight: Heavier pots provide stability for larger plants.
Following these guidelines confirms your anthurium thrives.
Soil Mix Preferences
For best growth, your red anthurium needs a well-draining soil mix rich in organic matter. Combine equal parts of orchid bark, peat moss, and perlite. This mix guarantees excellent aeration and prevents root rot by allowing excess water to escape.
When repotting, choose a pot with drainage holes to further improve water flow. Gently loosen the roots and remove old soil to avoid compacted areas. You should repot every two years, ideally in spring, to provide fresh nutrients and ample space for root development.
Always water the plant thoroughly after repotting to help it settle into its new environment. With the right soil mix, your anthurium will thrive, displaying vibrant red blooms and lush foliage.
Bloom Enhancement Tips
Maximize the blooming potential of your red Anthurium by making sure it receives bright, indirect sunlight and maintaining a consistent watering schedule. This keeps the plant vibrant and encourages more blooms.
To further enhance flowering, follow these specific tips:
- Humidity: Keep humidity levels around 70-80% by misting or using a humidifier.
- Fertilization: Apply a balanced, water-soluble fertilizer every six to eight weeks to provide essential nutrients.
- Temperature: Maintain a stable temperature between 70-85°F (21-29°C) to mimic its native environment.
- Pruning: Regularly remove spent flowers and yellowing leaves to direct energy towards new growth.
- Pot Size: Make sure the pot isn't too large; slightly root-bound conditions can stimulate blooming.
These steps will help your Anthurium flourish with vibrant red blooms.
Conclusion
Caring for your red anthurium plant is like nurturing a well-tuned instrument; each aspect needs attention to create a harmonious balance. By providing ideal light, correct watering, perfect humidity, and the finest soil mix, you'll guarantee vibrant blooms.
Don't forget regular fertilization, timely pruning, diligent pest control, and repotting when needed. With these tips, your anthurium will flourish, showcasing its stunning red flowers as a proof of your meticulous care.


