10 Essential Procedures for Disinfection of Anthurium Explants in Vitro Propagation
To disinfect Anthurium explants for in vitro propagation, start with disease-free, healthy explants. Rinse them in a 10% bleach solution for 5 minutes, followed by a sterile water rinse.
Immerse in 70% ethanol for 1 minute with stirring. Use 0.5-1.5% bleach for 10-15 minutes, ensuring thorough sterile water rinses afterward.
Apply a fungicide as per manufacturer's instructions, submerging explants for 10-15 minutes, then rinse. Follow with a 15-30 minute antibiotic treatment.
Dry explants under a laminar flow hood for 30 minutes on sterile towels. Transfer aseptically to propagation mediums.
For detailed methodology and finer nuances, continue further.
Key Takeaways
- Immerse explants in a 10% bleach solution for 5 minutes, followed by rinsing with sterile distilled water.
- Perform surface sterilization using a 70% ethanol solution for 1 minute with constant stirring.
- Apply a 70% ethanol solution for 30 seconds, ensuring uniform exposure, then rinse with sterile distilled water.
- Control bleach concentration between 0.5% and 1.5% for 10-15 minutes, followed by thorough rinsing.
- Submerge explants in a fungicide solution for 10-15 minutes, agitating gently, and rinse with sterile distilled water.
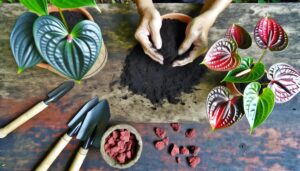
Selection of Explants
To begin with, select healthy, disease-free Anthurium explants that show no visible signs of damage or infection. Focus on vibrant, fully-developed leaves or stems, avoiding any with discoloration or lesions.
You'll need to examine each explant closely using a magnifying glass to detect any micro-level pathogens or pest infestations. Use a sterilized scalpel to carefully excise the selected tissue, validating you don't introduce contaminants during the cutting process.
Document the dimensions and weight of each explant to maintain consistency in your propagation trials. Track and record environmental conditions of the source plants, such as humidity and temperature, as these factors influence explant health.
This meticulous selection process secures the highest success rate for subsequent disinfection and in vitro propagation.
Initial Rinse
Begin the initial rinse by immersing the selected Anthurium explants in a 10% bleach solution for 5 minutes, ensuring thorough surface contact to eliminate superficial contaminants.
Using a sterile container, submerge the explants fully and gently agitate the solution to enhance contact with all surfaces. Monitor the immersion time precisely to avoid tissue damage.
After 5 minutes, transfer the explants to a sterile sieve and rinse them under sterile distilled water for 2-3 minutes to remove residual bleach. This step is essential to prevent chemical damage during subsequent procedures. Guarantee water flow is gentle to avoid mechanical injury.
Document the process meticulously, noting the time and conditions, to maintain reproducibility and consistency in the disinfection protocol.
Surface Sterilization
Proceed with surface sterilization by immersing the rinsed Anthurium explants in a 70% ethanol solution for 1 minute, ensuring consistent stirring to maximize contact. This step effectively reduces microbial load on the explants' surface. Agitation enhances ethanol penetration, guaranteeing thorough disinfection. Guarantee the ethanol concentration is precise, as deviations can compromise sterilization efficacy.
| Step | Duration | Purpose |
|---|---|---|
| Rinse | 5 mins | Remove debris and contaminants |
| Ethanol | 1 min | Surface sterilization |
| Agitation | Continuous | Enhance ethanol contact |
| Observation | Immediate | Check for visible contaminants |
| Next Step | N/A | Proceed to alcohol treatment |
Adopt sterile techniques during handling to prevent recontamination. Regularly calibrate instruments to maintain accuracy. Surface sterilization is essential for successful in vitro propagation.
Alcohol Treatment
When treating Anthurium explants with alcohol, you'll need to use a 70% ethanol solution for best results. Apply the alcohol for 30 seconds to guarantee effective sterilization while minimizing tissue damage.
Always handle the explants with sterilized tools to avoid contamination.
Concentration and Duration
To effectively disinfect Anthurium explants, immerse them in a 70% ethanol solution for 30 seconds, guaranteeing thorough coverage to reduce microbial contamination. Ethanol at this concentration disrupts the lipid membranes of bacteria and fungi, making it a potent disinfectant.
Maintain constant agitation to uniformly expose all explant surfaces to the ethanol. This brief exposure minimizes tissue damage while maximizing microbial reduction. Use a timer to make sure the 30-second duration is precise.
After immersion, immediately transfer the explants to a sterile rinse to remove residual ethanol. Data indicates that this concentration and duration balance efficacy and tissue integrity, providing an essential step in achieving contamination-free explants for successful in vitro propagation.
Sterilization Effectiveness
The effectiveness of the 70% ethanol treatment in sterilizing Anthurium explants depends on its ability to disrupt microbial cell membranes, thereby reducing contamination levels.
You'll need to immerse explants in 70% ethanol for about 30 seconds. This concentration is ideal for denaturing proteins and dissolving lipids in microbial cell walls.
Data indicate that a 70% ethanol solution achieves a 90-95% reduction in bacterial and fungal contaminants.
Make sure you agitate the explants gently during immersion to maximize contact between the ethanol and microbial surfaces.
Post-treatment, rinse the explants with sterile distilled water to remove residual ethanol, minimizing phytotoxic effects.
This method's precision and reliability make it a crucial part of successful in vitro propagation protocols.
Handling Precautions
Proper handling of Anthurium explants during alcohol treatment is fundamental to maintain sterilization efficacy and prevent tissue damage. You should submerge the explants in 70% ethanol for precisely 30 seconds. Overexposure can lead to tissue necrosis, while underexposure may result in inadequate sterilization. Use sterile forceps to transfer the explants to a laminar flow hood immediately after treatment.
| Step | Duration |
|---|---|
| Submerge | 30 seconds |
| Transfer | Immediate |
| Drying | Brief air exposure |
Ensure the explants dry briefly to avoid excess alcohol before subsequent procedures. These precise timings are critical; deviations can compromise the integrity of the explant and the overall success of in vitro propagation. Always wear sterile gloves to prevent contamination.
Bleach Disinfection
When using bleach for disinfection, you should carefully control bleach concentration levels, typically between 0.5% and 1.5%.
Guarantee the explants remain in the bleach solution for an ideal disinfection time duration of 10 to 15 minutes.
After treatment, thoroughly rinse the explants with sterile distilled water to remove any residual bleach and prevent phytotoxicity.
Bleach Concentration Levels
For effective disinfection of Anthurium explants, use a bleach solution at a concentration of 10% sodium hypochlorite. This concentration guarantees optimal microbial eradication while minimizing tissue damage.
Follow these steps:
- Preparation: Dilute commercial bleach (usually 5.25-6% sodium hypochlorite) to achieve a 10% working concentration.
- Sterilization: Immerse the explants in the bleach solution, ensuring they're fully submerged.
- Agitation: Continuously agitate the solution to enhance contact with all explant surfaces.
- Rinse: After treatment, thoroughly rinse the explants with sterile distilled water to remove residual bleach.
Using a 10% sodium hypochlorite solution can significantly decrease contamination rates, guaranteeing high success in in vitro propagation. This method is data-supported and widely recommended for its efficacy in maintaining explant viability.
Disinfection Time Duration
To achieve the most suitable disinfection results, immerse Anthurium explants in the 10% sodium hypochlorite solution for a specific duration of 10 to 15 minutes. This time range is crucial to balance effective microbial elimination and minimal tissue damage. Disinfection efficacy is optimized within this timeframe, as studies show a significant reduction in contamination rates.
| Time (minutes) | Contamination Rate (%) | Tissue Damage (Rating) |
|---|---|---|
| 5 | 40 | Low |
| 10 | 10 | Minimal |
| 15 | 5 | Moderate |
| 20 | 3 | High |
| 25 | 1 | Severe |
Ensure you maintain accurate timing by using a stopwatch. By employing this method, you'll effectively balance disinfection efficiency and tissue integrity, leading to the best explant viability for in vitro propagation.
Rinsing Post-Bleach Treatment
After the disinfection process, promptly rinse the Anthurium explants in sterile distilled water to remove any residual sodium hypochlorite. This step is critical to prevent chemical damage and guarantee successful in vitro propagation.
Follow these steps:
- First Rinse: Submerge explants in sterile distilled water for 5 minutes, agitating gently to dislodge bleach residues.
- Second Rinse: Transfer explants to a fresh sterile distilled water container for another 5 minutes.
- Third Rinse: Repeat the process to confirm thorough removal of sodium hypochlorite.
- Final Rinse: Use a final sterile distilled water rinse, lasting 10 minutes, to confirm complete decontamination.
This four-step rinsing method guarantees the explants are free from bleach, minimizing phytotoxicity and maximizing tissue viability for subsequent culturing stages.
Rinsing Steps
Begin the rinsing steps by thoroughly washing the Anthurium explants with sterile distilled water to remove any residual disinfectant. Utilize a gentle stream to avoid tissue damage. Perform multiple rinses, ideally, three to five times, making sure each rinse lasts about two minutes. This repetition guarantees the complete removal of residual chemicals that could inhibit in vitro growth.
Data indicates that insufficient rinsing can result in phytotoxicity, adversely affecting explant viability. Use a laminar flow hood to maintain sterility during rinsing. Monitor the explants closely for any signs of damage or contamination.
After completing the rinsing process, proceed immediately to the next steps in your protocol to minimize the risk of microbial recontamination.
Fungicide Application
Apply a broad-spectrum fungicide solution to the Anthurium explants, guaranteeing uniform coverage to prevent fungal contamination during the in vitro culture process.
Follow these steps for best results:
- Prepare the Solution: Dilute the fungicide according to the manufacturer's recommendations, typically involving a concentration of 1-2 grams per liter.
- Immerse Explants: Submerge the explants in the fungicide solution for 10-15 minutes to guarantee thorough contact.
- Agitation: Gently agitate the solution intermittently to facilitate even distribution of the fungicide across the explant surfaces.
- Rinse: After treatment, rinse the explants with sterile distilled water to remove any residual fungicide, minimizing phytotoxicity risks.
Implementing these steps reduces fungal contamination significantly, improving the success rate of your in vitro cultures.
Antibiotic Treatment
Consistently administer a suitable antibiotic solution to the Anthurium explants to mitigate bacterial contamination. Ensure the concentration aligns with empirical data for best efficacy. Opt for antibiotics like tetracycline or gentamicin, as studies indicate their effectiveness in in vitro conditions.
Prepare a sterile solution at the recommended concentration, typically 100 mg/L, and immerse the explants for a duration of 15-30 minutes. This exposure time maximizes bacterial eradication while minimizing phytotoxicity.
Post-treatment, rinse the explants with sterile distilled water to remove any residual antibiotic. Regularly monitor for signs of bacterial presence to determine if supplementary treatments are necessary.
This diligent application of antibiotics enhances the success rate of subsequent tissue culture processes.
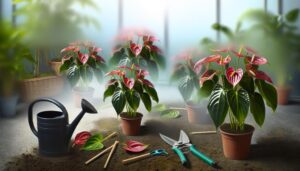
Drying Explants
After rinsing, place the Anthurium explants on sterile paper towels under a laminar flow hood for approximately 30 minutes to guarantee thorough drying and reduce excess moisture. This step is essential to prevent microbial growth and ensure ideal conditions for subsequent tissue culture procedures.
Follow these specific steps to achieve effective drying:
- Position explants: Arrange the explants evenly on the paper towels to maximize exposure to airflow.
- Monitor humidity: Ensure the laminar flow hood maintains a low-humidity environment to facilitate efficient drying.
- Avoid contamination: Keep the laminar flow hood closed and use sterile tools to handle explants.
- Check dryness: After 30 minutes, confirm that the explants are dry by gently touching them with sterile forceps.
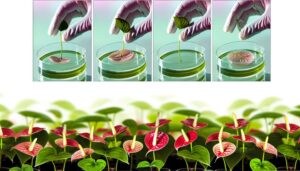
Aseptic Transfer
To safeguard the sterility of your tissue culture, transfer the dried Anthurium explants to new sterile culture vessels using aseptic techniques within the laminar flow hood. First, sterilize your hands and tools with 70% ethanol. Use sanitized forceps to handle the explants, minimizing contact with non-sterile surfaces. Carefully place each explant into a pre-prepared culture vessel containing a nutrient medium.
| Step | Procedure | Time (seconds) |
|---|---|---|
| Hand Sterilization | Use 70% ethanol to sanitize hands | 30 |
| Tool Sterilization | Dip tools in ethanol, flame briefly | 15 |
| Explant Handling | Use sanitized forceps | 10 |
| Transfer Explant | Place in sterile vessel | 20 |
| Final Check | Verify no contamination | 15 |
Following these steps guarantees a contamination-free environment, crucial for successful in vitro propagation.
Conclusion
To wrap up, you've carefully chosen explants, thoroughly rinsed them, accurately surface sterilized, and attentively treated with alcohol and bleach.
You've applied fungicides and antibiotics thoughtfully, guaranteed proper drying, and executed aseptic transfers smoothly.
By following these 10 crucial steps, you've optimized the sterility and viability of anthurium explants for a prosperous in vitro propagation.
Each stage, rooted in scientific rigor, plays a part in the overall triumph of your tissue culture efforts.