10 Essential Steps to Repot Your Red Anthurium
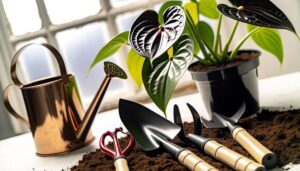
Repotting your red Anthurium involves several key steps to make sure healthy growth and vibrant blooms. First, gather sterilized pruning shears, a watering can, sphagnum moss, and a high-quality potting mix.
Choose a terracotta or ceramic pot with ample drainage holes. Opt for a soil blend rich in organic material, perlite, peat moss, and pine bark.
Prune yellowing leaves and leggy stems, then carefully remove the plant from its old pot. Inspect the roots, trim if necessary, and place in the new pot, filling with fresh soil.
Water thoroughly and place in indirect light for acclimation. For detailed procedural insights, continue exploring.
Key Takeaways
- Select a well-draining pot slightly larger in diameter with ample drainage holes.
- Use a soil blend rich in organic material, perlite, peat moss, and pine bark.
- Prune yellowing leaves, leggy stems, and thin out crowded areas before repotting.
- Carefully repot, inspect roots, and maintain the ideal soil level avoiding crown submersion.
- Thoroughly water the repotted plant and place it in indirect light for acclimation.
Gather Your Supplies
Assembling the necessary supplies is a crucial first step in guaranteeing a successful repotting of your Red Anthurium. Begin by selecting a high-quality, well-draining potting mix rich in organic matter; a mix specifically formulated for aroids works best.
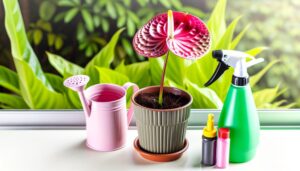
Gather sterilized pruning shears or scissors for trimming dead or damaged roots. A clean tarp or workspace mat will help contain soil spillage. Make sure you have a watering can with a fine nozzle for precise hydration.
Additionally, consider using a root hormone to promote root growth, and have sphagnum moss on hand to enhance moisture retention. Finally, prepare a pair of clean gloves to protect your hands from potential irritants present in the plant or soil.
With these supplies ready, you're well-prepared to proceed.
Choose the Right Pot
Selecting an appropriately sized, well-draining pot is crucial for maintaining ideal root health and preventing waterlogged soil conditions in your Red Anthurium.
Choose a pot that is 1-2 inches larger in diameter than the current container to accommodate root growth without causing excessive moisture retention. Confirm the pot has ample drainage holes to facilitate water expulsion and prevent root rot.
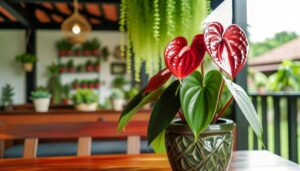
Materials such as terracotta or ceramic are preferable due to their breathability, which aids in aerating the root system. Avoid overly large pots, as they can retain excess water, leading to fungal issues.
Consider a pot with a saucer to capture draining water, making sure it is emptied regularly to avoid stagnant moisture accumulation.
Select the Ideal Soil
Choosing the perfect soil for your Red Anthurium is essential for its health and growth. The soil makeup should consist of a well-balanced blend of organic material, like peat moss and pine bark, to guarantee nutrient availability and aeration.
Furthermore, adequate soil drainage is vital to avoid waterlogging and root rot, which can be accomplished by adding perlite or coarse sand to the mix.
Soil Composition Requirements
To maximize growth and vibrant blooms, the soil composition for repotting your Red Anthurium should be a well-draining, aerated mix abundant in organic matter. Achieving the best soil environment involves combining specific components that cater to the plant's natural habitat.
- Peat Moss: This organic material retains moisture while providing essential aeration, mimicking the plant's natural epiphytic conditions.
- Pine Bark: Incorporating pine bark enhances drainage and prevents soil compaction, vital for root health.
- Perlite: This lightweight volcanic glass improves soil aeration and drainage, preventing root rot and promoting healthy root growth.
Each component plays an essential role in maintaining a balance between moisture retention and aeration, ensuring your Red Anthurium thrives.
Proper Soil Drainage
Promoting proper soil drainage is crucial for the health of your Red Anthurium, as it prevents waterlogged conditions that can lead to root rot and other harmful issues.
To achieve optimal drainage, select a well-ventilated, loose substrate. A blend consisting of equal parts orchid bark, perlite, and peat moss is ideal. Orchid bark enhances aeration, perlite improves drainage and prevents compaction, while peat moss retains essential moisture without waterlogging.
Incorporate a small quantity of horticultural charcoal to inhibit bacterial growth and maintain soil freshness. Ensure the pot has ample drainage holes to facilitate excess water escape.
Water the Anthurium
Proper hydration is crucial for maintaining the health and vibrancy of your red Anthurium, requiring a careful balance to avoid both under- and over-watering.
To achieve peak moisture levels, follow these guidelines:
- Check Soil Moisture: Insert your finger 1-2 inches into the soil. If it feels dry at this depth, it's time to water.
- Watering Technique: Use lukewarm, filtered water. Pour slowly until water drains from the bottom of the pot, ensuring uniform moisture distribution.
- Drainage Importance: Guarantee the pot has sufficient drainage holes to prevent waterlogging, which can lead to root rot.
Remove From Old Pot
Start by gently loosening the root ball to minimize damage to the roots during removal from the old pot.
Thoroughly examine the root system for any signs of disease or decay, eliminating any compromised sections with sterilized pruning shears.
Lastly, shake off extra soil to facilitate a smooth shift to the new potting mixture, promoting ideal root aeration and growth.
Loosen Root Ball
When repotting your red anthurium, gently grasp the base of the plant and carefully lift it from its current container, making certain to support the root ball to prevent damage.
Once removed, it is crucial to loosen the root ball to promote healthy growth in its new environment.
Follow these steps to effectively loosen the root ball:
- Gently Tease the Roots: Use your fingers to delicately separate the roots, making sure that they are not compacted.
- Trim Dead Roots: Carefully prune any compromised or dead roots with sterilized scissors to promote new root development.
- Shake Off Excess Soil: Lightly shake the root ball to remove any old soil clinging to the roots, improving aeration.
These steps guarantee your red anthurium adapts seamlessly to its new pot.
Inspect Root Health
Carefully examine the roots for signs of rot, disease, or pests, ensuring the plant's overall health before proceeding with repotting.
Gently remove the Red Anthurium from its current pot, taking care not to damage the root system. Inspect the roots for dark, mushy areas indicative of rot, which should be pruned away using sterilized pruning shears.
Look for signs of disease, such as discolored or misshapen roots, and cut away any affected sections. Additionally, check for pests like root aphids or nematodes; a magnifying glass can aid in this meticulous inspection.
Healthy roots should appear white or light tan and be firm to the touch. Ensuring root health is crucial for successful repotting and long-term plant well-being.
Shake Off Soil
Gently loosen the soil around the roots by tapping the sides of the pot and then carefully tilt the container to slide the Red Anthurium out, supporting the base of the plant with your hand. Once removed, proceed to shake off excess soil adhering to the root system. This step is vital for evaluating root health and ensuring the best nutrient uptake in the new substrate.
To effectively shake off soil:
- Hold the plant base firmly with one hand while gently shaking the roots with the other.
- Gently separate any compacted soil using your fingers or a small, sanitized tool.
- Check for root rot or other issues, trimming any damaged roots with sterilized scissors.
These actions facilitate a successful shift to the new potting medium.
Inspect the Roots
Examine the roots for signs of rot, disease, or overcrowding to promote the health and well-being of your red anthurium. Carefully uncoil the root ball and scrutinize each root structure. Healthy roots should appear firm, white, or light tan.
Brown, mushy, or foul-smelling roots indicate rot and should be excised immediately. Inspect for any signs of fungal or bacterial infection, such as discolored or slimy areas, and remove affected roots.
Overcrowded roots, characterized by dense tangling and circling around the pot, hinder water and nutrient absorption. Gently tease apart these roots to encourage proper growth in the new pot.
Trim and Prune
Before repotting, meticulously trim and prune the red anthurium to remove any dead or damaged leaves, promoting plant health and vigor. Utilize sterilized pruning shears to make clean cuts, which prevent disease transmission and encourage optimal growth. Follow these steps:
- Identify and Remove: Examine the plant for yellowing, browning, or wilted leaves. Cut these at their base, close to the main stem.
- Prune Leggy Stems: Trim excessively long or leggy stems to encourage bushier growth. Make cuts just above a leaf node to stimulate new shoots.
- Thin Out Crowded Areas: If the foliage is dense, selectively prune to increase air circulation, reducing the risk of fungal infections.
These practices promote your red anthurium remains strong and aesthetically pleasing.
Place in New Pot
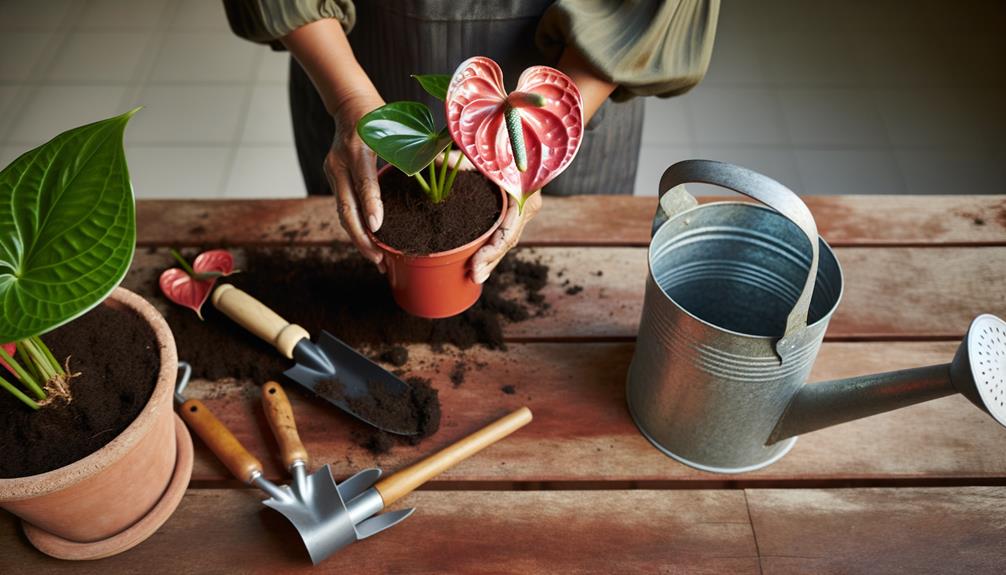
After completing the necessary pruning, carefully remove the red anthurium from its current pot, minimizing root disturbance. Gently shake off excess soil clinging to the roots, exercising caution to avoid any breakage. Inspect the root ball for signs of rot or disease, trimming any affected areas with sterilized shears.
Select a new pot that is one to two inches larger in diameter than the previous one, making sure it has adequate drainage holes. Position the anthurium in the center of the new pot, allowing the root system to fan out naturally. Make sure the plant's crown sits slightly above the new soil line, facilitating ideal aeration and reducing the risk of root rot.
Fill With Fresh Soil
When filling the pot with fresh soil, it is important to use a well-draining mix rich in organic matter to support the Anthurium's root structure and aeration needs.
Make sure that the soil composition includes a balance of peat, perlite, and pine bark to maintain best moisture levels without causing waterlogging.
Carefully position the plant so that the root ball is just below the pot's rim, making sure the crown is slightly above the soil line to prevent rot.
Soil Composition Matters
Selecting the finest soil composition for repotting your Red Anthurium is crucial for ensuring sufficient drainage, aeration, and nutrient availability, thereby promoting healthy root development and overall plant health.
An excellent potting mix for Red Anthurium should be well-draining yet moisture-retentive, mimicking the plant's natural tropical habitat. Consider the following components when preparing your soil mixture:
- Peat Moss: Enhances moisture retention while providing a lightweight structure.
- Pine Bark: Improves drainage and aeration, preventing root rot by facilitating air circulation.
- Perlite or Vermiculite: Adds further drainage properties, ensuring roots receive sufficient oxygen.
Combining these elements in a balanced proportion will create an ideal environment for your Red Anthurium, promoting strong growth and vibrant blooms.
Proper Soil Level
Ensuring the correct soil level is essential for Red Anthurium, as it directly impacts root establishment and overall plant stability.
Begin by placing a layer of fresh, well-draining potting mix at the bottom of the new container. Position the plant so that the root ball sits slightly below the rim, ensuring the crown is level with the soil surface.
Gradually fill in around the roots with additional potting mix, gently pressing to eliminate air pockets. Maintain a soil depth that allows for adequate moisture retention without submerging the crown, which can lead to rot.
Water and Settle
Proper hydration and stabilization are vital to ensure the successful repotting of your red Anthurium plant. Begin by thoroughly watering the freshly repotted Anthurium to settle the soil and eliminate air pockets around the roots.
Follow these steps diligently:
- Initial Watering: Apply water evenly until it drains out of the bottom holes, providing thorough root hydration.
- Soil Compaction: Gently press the soil surface to secure the plant, but avoid excessive compaction that could hinder root growth.
- Positioning: Place the pot in a location with indirect light, maintaining ideal humidity and temperature (18-25°C).
This method guarantees the Anthurium acclimates to its new environment, promoting strong growth and vibrant blooms.
Conclusion
In sum, repotting a red anthurium involves careful preparation and execution. The aforementioned steps—gathering supplies, selecting a suitable pot and soil, and carefully transferring the plant—ensure best growth and health.
By adhering to these guidelines, the anthurium's vibrant foliage and striking blooms can be preserved and enhanced. Ultimately, the methodical approach to repotting serves as the cornerstone for cultivating robust and flourishing anthuriums, illustrating the symbiosis between horticultural precision and plant essentiality.

