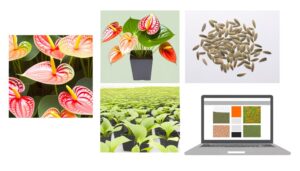
5 Steps to Successfully Propagate Anthurium Salvinii
To propagate Anthurium salvinii, first gather materials like sterile pruning tools, well-draining potting mix, and rooting hormone. Choose a healthy cutting with nodes, making sure it's pest-free.
Prepare a substrate blend of orchid bark, perlite, and sphagnum moss, sterilized at 180°F for 30 minutes. Plant the cutting in slightly damp medium, maintaining high humidity, adequate light, and stable temperature.
Confirm soil moisture by checking the top inch, and monitor regularly for best conditions. Now, you're set up for successful propagation, but specific care details might refine your technique even further.
Key Takeaways
- Select a healthy, pest-free stem with nodes and no flowers for optimal propagation.
- Sterilize pruning tools and cuttings with isopropyl alcohol to prevent infections.
- Plant the cutting in a well-draining mix of orchid bark, perlite, and sphagnum moss.
- Maintain high humidity (70-80%) and consistent moist soil without waterlogging.
- Ensure bright, indirect light and keep the temperature between 65-80°F for best growth.
Gather Necessary Materials
To successfully propagate Anthurium salvinii, you'll need to gather a sterile pruning tool, a well-draining potting mix, rooting hormone, and clean pots. Sterilize your pruning tool using isopropyl alcohol to prevent disease transmission.
Choose a potting mix that includes perlite or orchid bark for ideal drainage. Rooting hormone, available as powder, liquid, or gel, enhances root formation by stimulating growth.
Guarantee your pots have drainage holes to prevent waterlogging, which can cause root rot. Clean the pots thoroughly with soapy water and rinse well to remove any residues.
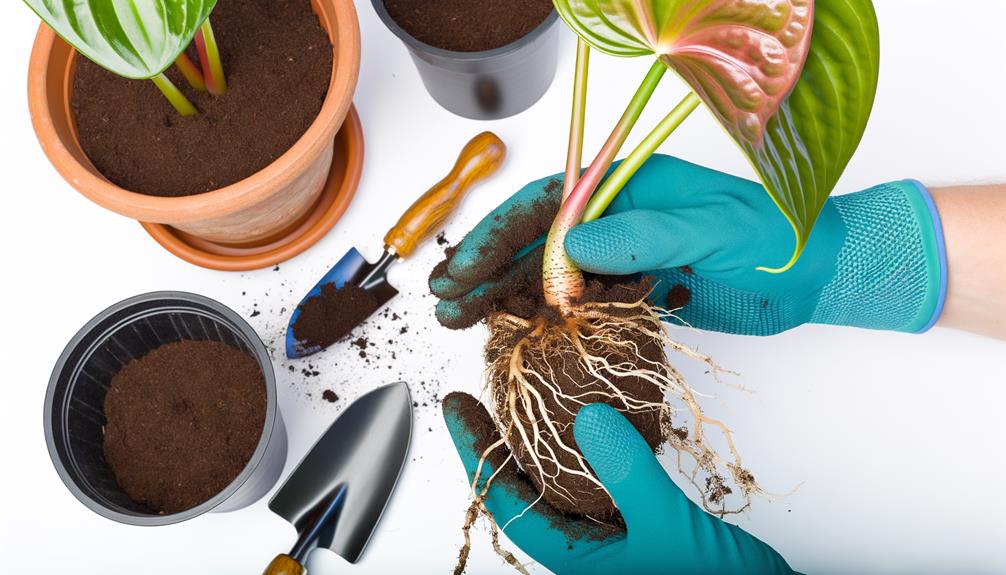
Choose the Right Cutting
When selecting a cutting for propagation, make sure it's a healthy section of the plant with at least one node and a few leaves. The cutting should be free from diseases and pests. Use sterilized pruning shears to make a clean cut below a node. This guarantees ideal growth potential.
To select the right cutting:
- Inspect Leaf Health: Leaves should be green and free from spots or discoloration.
- Check for Nodes: Ensure the cutting includes at least one node, as it's essential for root development.
- Assess Stem Integrity: The stem should be firm, not mushy or wilted.
- Avoid Flowering Stems: Focus on non-flowering sections to promote vegetative growth.
- Confirm Absence of Pests: Examine closely for signs of insect infestation.
These criteria optimize your chances of successful propagation.
Prepare the Planting Medium
Choose a well-draining substrate full of organic material to promote the best root growth for your Anthurium salvinii cuttings. Start by mixing equal parts of orchid bark, perlite, and sphagnum moss. This combination guarantees excellent aeration and moisture retention.
Sterilize the mixture by baking it at 180°F for 30 minutes to eliminate pathogens. Allow it to cool before use. Fill small pots with the prepared substrate, ensuring it's slightly damp but not waterlogged. The organic material will provide essential nutrients and support microbial activity, vital for root development.
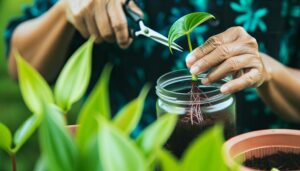
Plant the Cutting
With your planting medium prepared and pots filled, gently insert the base of the Anthurium salvinii cutting into the shallow hole you created. Ensure the cutting is upright and the nodes are just above the soil surface. Firmly press the medium around the base to secure it. It's essential that the cutting remains stable and doesn't tilt.
Remember the following:
- Maintain Humidity: Cover the pot with a plastic bag to create a mini greenhouse effect.
- Adequate Light: Place the pot in a location with indirect sunlight.
- Temperature Control: Keep the environment between 70-80°F (21-27°C).
- Soil Moisture: The medium should be consistently moist but not waterlogged.
- Avoid Disturbance: Refrain from moving the pot unnecessarily to allow root development.
These steps promote ideal rooting conditions for your Anthurium salvinii cutting.
Provide Proper Care
Proper care for your Anthurium salvinii cutting involves monitoring and adjusting humidity levels, maintaining consistent soil moisture, and providing ideal light and temperature conditions. Maintain 70-80% humidity to mimic its natural environment. Use a hygrometer to measure and a humidifier to adjust as needed. Water when the top inch of soil feels dry; overwatering can induce root rot. Place the cutting in bright, indirect light, avoiding direct sun that can scorch leaves. Ideal temperature ranges from 65-80°F (18-27°C).
| Parameter | Ideal Range | Tools Needed |
|---|---|---|
| Humidity | 70-80% | Hygrometer, Humidifier |
| Soil Moisture | Top inch dry before watering | Finger test, Moisture meter |
| Light and Temperature | Bright indirect, 65-80°F | Thermometer, Light meter |
Regularly check these parameters to maintain prime conditions.
Conclusion
And there you have it, you've just propagated anthurium salvinii like a pro!
Who knew you could turn a simple cutting into a thriving plant with just a bit of soil, water, and patience?
It's almost as if Mother Nature herself wanted you to become a botanist.
So sit back, pat yourself on the back, and enjoy the irony that your green thumb might be more skilled than you ever imagined.
Happy growing!