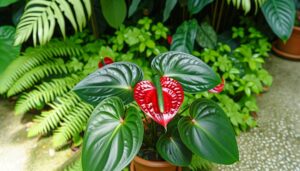
Anthurium Plant Verzorging: Essential Care Tips
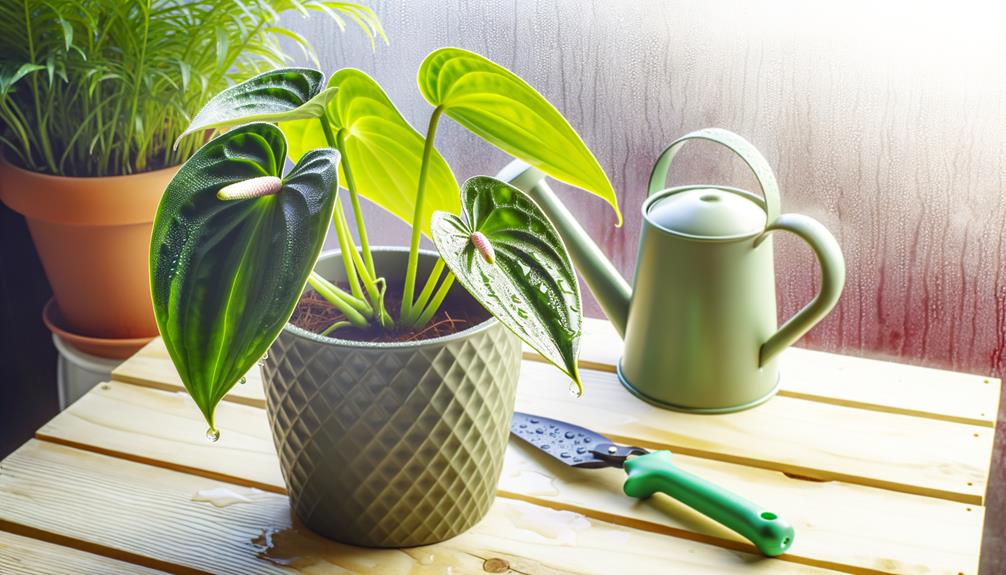
To care for your Anthurium, provide bright, indirect light and avoid direct sunlight. Water when the top inch of soil is dry, typically every 5-7 days in spring/summer and 10-14 days in fall/winter.
Maintain temperatures between 65°F and 80°F, with humidity levels between 60% and 80%. Use a well-draining potting mix with pine bark, peat moss, and perlite, and repot every 2-3 years.
Fertilize with a 20-20-20 water-soluble solution diluted to half strength every 6-8 weeks, except in winter. Prune dead or damaged leaves and monitor for pests and diseases regularly.
Dive deeper into each aspect for flourishing results.
Key Takeaways
- Provide bright, indirect light and avoid direct sunlight.
- Water when the top inch of soil is dry, typically every 5-7 days in warmer months.
- Maintain temperatures between 65°F and 80°F and keep humidity levels between 60% and 80%.
- Use a well-draining potting mix that includes pine bark, peat moss, and perlite.
- Fertilize with a diluted 20-20-20 N-P-K water-soluble fertilizer every 6-8 weeks, except in winter.
Optimal Lighting
Have you ever wondered how to provide the ideal lighting conditions for your Anthurium to thrive?
Guarantee your Anthurium receives bright, indirect light. Direct sunlight can scorch its leaves, while insufficient light inhibits blooming. Place it near a north or east-facing window, where it can bask in diffused sunlight.
If natural light is inadequate, consider using fluorescent grow lights, maintaining them at a distance of 12-18 inches from the plant.
Monitor the Anthurium for signs of light stress. Yellowing leaves may indicate too much light, while leggy growth suggests insufficient illumination. Rotating the plant periodically guarantees even light exposure.
Watering Schedule
To maintain peak health, you should water your Anthurium when the top inch of soil feels dry, typically once a week.
Monitor soil moisture levels using a hygrometer to prevent root rot.
Adjust your watering schedule seasonally, reducing frequency in winter when the plant's growth rate slows.
Optimal Watering Frequency
Ensuring the best watering frequency for your Anthurium involves monitoring soil moisture levels and adjusting based on seasonal changes and the plant's specific needs. During the growing season, typically spring and summer, you'll need to water more frequently due to increased transpiration rates. In contrast, reduce watering in fall and winter when the plant's metabolic activity slows down.
Always allow the top inch of soil to dry between waterings to prevent root rot.
During spring and summer, water every 5-7 days, depending on humidity and light conditions. In fall and winter, water every 10-14 days as the plant's water uptake decreases.
Check the soil by inserting your finger into it; if it feels dry up to the first knuckle, it's time to water.
Adjust the watering frequency as necessary based on your plant's environment.
Soil Moisture Levels
Monitoring soil moisture levels is crucial for maintaining a healthy Anthurium. This requires you to consistently check the dampness of the top inch of soil to determine the appropriate watering schedule. Insert your finger into the soil up to the first knuckle; if it feels dry, it's time to water.
Aim for evenly moist soil without waterlogging, as Anthuriums are susceptible to root rot in overly saturated conditions. Utilize a well-draining potting mix, combining orchid bark, peat moss, and perlite to enhance aeration. To achieve optimal hydration, water thoroughly until excess drains from the pot's bottom, promoting deep root growth.
Regularly monitor moisture levels with a soil moisture meter for precision, adjusting your watering schedule according to the plant's needs.
Seasonal Adjustments
With soil moisture levels well understood, adjusting your Anthurium's watering schedule according to seasonal changes becomes the next important step. During the growing season (spring and summer), increase watering frequency to maintain consistent substrate moisture. However, avoid waterlogging, as it can lead to root rot.
In the dormant period (fall and winter), reduce watering to prevent excessive moisture, which can cause fungal issues. Focus on guaranteeing the top 2 inches of soil dry out between waterings.
- Spring/Summer: Water every 5-7 days, guaranteeing even moisture.
- Fall/Winter: Water every 10-14 days, allowing the soil to dry more thoroughly.
- Humidity: Maintain humidity levels around 60-80% by misting or using a humidifier.
Adapting your care routine ensures prime health and vibrant blooms.
Temperature Requirements
To guarantee ideal growth, maintain anthurium plants at a temperature range between 65°F and 80°F. Avoid exposing them to temperature extremes below 55°F or above 90°F, as this can stress the plant.
Regularly monitor and adjust humidity levels to mimic their native tropical environment, ideally around 60-80%.
Ideal Temperature Range
Anthurium plants thrive in a temperature range between 65°F and 80°F, ensuring their tropical origins are respected for best growth. Maintaining consistent temperatures within this range is essential for peak health and flowering.
You should monitor your indoor environment closely, as fluctuations can stress the plant.
Daytime Temperatures:
Aim to keep daytime temperatures around 75°F for robust growth.
Nighttime Temperatures:
Slightly cooler nighttime temperatures, around 68°F, help simulate natural conditions.
Thermometer Usage:
Employ a reliable thermometer to regularly check the ambient temperature near your Anthurium.
Avoiding Temperature Extremes
Maintaining the best temperature range is crucial, but it's equally important to prevent your Anthurium from experiencing temperature extremes that can inhibit growth and cause damage. Ensure your Anthurium stays between 20-25°C (68-77°F) during the day and no lower than 15°C (59°F) at night. Avoid placing your plant near drafts, heating vents, or air conditioning units as rapid temperature shifts can stress the plant.
Use the table below to guide you:
| Temperature Condition | Ideal Range | Extremes to Avoid |
|---|---|---|
| Daytime Temperature | 20-25°C | Below 15°C or above 30°C |
| Nighttime Temperature | 15-20°C | Below 10°C or above 25°C |
| Placement Considerations | Away from drafts | Near heating/cooling sources |
Monitoring Humidity Levels
Maintaining ideal humidity levels is essential for Anthurium health, ideally keeping a relative humidity between 60-80%. To achieve this, you can use a hygrometer to monitor environmental humidity accurately.
If levels are too low, consider the following methods:
- Misting: Regularly mist the leaves with distilled water to increase surface moisture.
- Humidifiers: Place a humidifier near the plant to consistently boost ambient humidity.
- Pebble Trays: Set the plant pot on a tray filled with water and pebbles to create a humid microenvironment through evaporation.
Additionally, avoid placing Anthuriums near heating vents or air conditioners, as these can significantly reduce humidity levels.
Humidity Levels
When cultivating Anthurium plants, maintaining a humidity level between 60% and 80% is crucial to replicate their natural tropical environment. To accomplish this, utilize a hygrometer to accurately monitor the surrounding humidity.
If levels decrease below 60%, utilize a humidifier or position the plant on a humidity tray filled with water and pebbles. Additionally, misting the foliage daily with distilled water can aid in sustaining adequate moisture levels. Avoid using tap water, as it may contain chlorine and minerals that are detrimental to the plant.
Ensuring proper air circulation to prevent fungal diseases by situating the plant in a well-ventilated area is important. Consistently upholding these conditions will encourage lush, vibrant foliage and optimal growth for your Anthurium.
Soil Preferences
For best growth, Anthurium plants need a well-draining potting mix rich in organic matter and slightly acidic pH. You'll need to create an ideal soil composition to imitate their natural rainforest habitat. Use a mix that includes:
- Pine bark: Enhances aeration and drainage, preventing root rot.
- Peat moss: Retains moisture while maintaining the slightly acidic pH Anthuriums prefer.
- Perlite: Improves soil drainage and prevents compaction.
Ensure the potting mix maintains consistent moisture without becoming waterlogged.
Repot your Anthurium every 2-3 years to refresh the soil and provide more space for root growth. Avoid using heavy garden soil, as it can suffocate roots and hinder your plant's health. Proper soil composition is essential for robust Anthurium growth.
Fertilizing Tips
To promote lush foliage and vibrant blooms, fertilize your Anthurium with a balanced, water-soluble fertilizer diluted to half strength every 6-8 weeks during the growing season. Choose a fertilizer with an N-P-K ratio of 20-20-20 to secure your plant receives essential macronutrients. Dissolve the fertilizer in water according to the package instructions, then reduce the concentration by half.
During each application, water the soil thoroughly to secure even nutrient distribution and to prevent root burn.
Avoid fertilizing during the dormant winter months, as this can lead to nutrient buildup and potential toxicity.
Monitor your Anthurium for signs of over-fertilization, such as yellowing leaves or stunted growth, and adjust the feeding schedule accordingly.
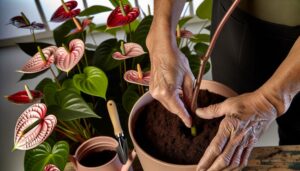
Repotting Guide
Repot your Anthurium every 2-3 years to make certain it has ample room for root growth and to refresh the potting mix. Start by selecting a container that's 1-2 inches larger in diameter than the current one. Use a well-draining potting mix, ideally an orchid mix or a blend containing perlite, pine bark, and peat moss.
Gently remove the plant from its old pot, being careful not to damage the roots. Place it in the new container and fill around the root ball with fresh potting mix.
Water thoroughly: Make sure the mix is evenly moist but not waterlogged.
Check drainage: Excess water should escape easily to prevent root rot.
Post-repotting care: Position the plant in indirect light and avoid fertilizing for a month.
Pruning Techniques
When pruning your Anthurium, start by identifying and cutting away any dead or damaged leaves to promote healthy growth and maintain the plant's aesthetic appeal. Use sterilized pruning shears to avoid introducing pathogens.
Locate leaves that are yellowing, brown, or wilted. Make clean cuts at the base of the petiole, near the main stem, ensuring you don't damage healthy tissue.
Periodically, thin out overcrowded areas to improve air circulation and light penetration. Trim any leggy growth to encourage a bushier appearance.
Always remove spent flowers to direct the plant's energy towards new growth. Regularly inspect the plant for any signs of stress and adjust your pruning frequency accordingly.
Pruning helps maintain your Anthurium's overall essential and visual charm.
Pest Control
Effective pest control for your Anthurium involves regular monitoring for common pests like spider mites, aphids, and mealybugs, which can compromise the plant's health and vigor. Begin by inspecting the undersides of leaves and stems weekly. If you identify an infestation, act swiftly to mitigate damage. Use insecticidal soap or neem oil, ensuring thorough coverage on affected areas. Isolate the infested plant to prevent spread.
Here are some effective strategies:
- Manual removal: Wipe off pests with a damp cloth.
- Biological control: Introduce beneficial insects like ladybugs.
- Chemical treatment: Apply horticultural oils as per manufacturer's instructions.
Regularly maintain a clean environment to deter pests and support your Anthurium's best growth and health.
Disease Prevention
To prevent diseases in your Anthurium, maximize air circulation and avoid waterlogging by using well-draining soil. Verify your potting mix contains components like perlite or orchid bark for aeration.
Water the plant when the top inch of soil feels dry; overwatering leads to root rot. Position your Anthurium in bright, indirect light to promote healthy growth.
Maintain relative humidity above 60%, but avoid misting, as stagnant moisture can encourage fungal infections. Regularly inspect leaves for signs of bacterial blight or fungal spots. If detected, prune affected areas using sterilized scissors and apply a fungicide.
Rotate the plant periodically to ensure even light distribution and prevent stress. This proactive approach minimizes disease risks effectively.
Propagation Methods
When propagating your Anthurium, you'll find three main techniques:
- Leaf cuttings: Begin with leaf cuttings by selecting a healthy leaf and ensuring you include a portion of the petiole.
- Root division: For the root division method, carefully separate the plant at the rhizome, making sure each section has sufficient roots and stems.
- Seed germination: To propagate through seed germination, gather seeds from a mature Anthurium and plant them in a suitable growing medium.
Each method has its own requirements and success rates, so it's essential to choose the one that best suits your skills and resources.
Leaf Cuttings Technique
Propagating anthuriums through leaf cuttings involves selecting a healthy leaf with a portion of the petiole intact and verifying it has at least one visible node for optimal root development. First, sterilize your cutting tools to prevent infection. Carefully cut the leaf with a sharp knife, maintaining a clean edge.
Next, dip the cut end in rooting hormone to stimulate root growth. Plant the leaf cutting in a well-draining medium, such as a mix of perlite and peat moss. Keep the soil consistently moist but not waterlogged.
Position the pot in a warm, humid environment with indirect light.
Monitoring for root growth should be done in 4-6 weeks. Remember to maintain high humidity by misting regularly.
This technique guarantees robust propagation.
Root Division Method
You'll find that the root division method offers a reliable way to propagate anthuriums by carefully separating the plant's root clumps into smaller sections, each containing at least one healthy stem and root system.
Begin by removing the anthurium from its pot and gently shaking off excess soil to expose the roots. Use a sterilized knife to cut through the root ball, ensuring each new division has a robust section of roots and a few leaves.
Replant each division in a well-draining potting mix, ideally an orchid or aroid blend, and water thoroughly. Place the newly potted divisions in a warm, humid environment with indirect light to encourage growth and reduce transplant shock.
Seed Germination Process
To propagate anthuriums through seed germination, start by collecting ripe seeds from a mature plant and sow them immediately in a sterile, well-draining mixture. Ensure the mixture is moist but not waterlogged. Place the seeds on the mixture surface and lightly press them in, ensuring they maintain contact with the medium.
To promote germination, maintain a consistent temperature of 25-30°C (77-86°F) and high humidity. Cover the container with plastic wrap or a transparent lid to create a mini greenhouse effect. Germination typically takes 1-2 weeks.
Key steps to follow:
- Use a sterile, well-draining mixture.
- Maintain ideal temperature and humidity.
- Cover the container to retain moisture.
Monitor the seedlings and transplant them once they develop two true leaves.
Seasonal Care
Adjusting the care of your Anthurium plant according to the changing seasons is crucial for maintaining its health and vibrant blooms. During spring and summer, maintain consistent moisture by irrigating when the top inch of soil dries out. Increase humidity around the plant using a humidifier or a pebble tray. Fertilize bi-monthly with a balanced, water-soluble fertilizer to promote growth.
In autumn and winter, reduce watering frequency, allowing the soil to dry out more between irrigations. Keep ambient temperatures above 60°F (15°C) and avoid cold drafts. Limit fertilization to once every 4-6 weeks, as the plant's growth rate decreases.
Monitor for pests like spider mites, which can multiply in dry indoor conditions. Adjusting care to these seasonal variations ensures a thriving Anthurium.
Conclusion
Caring for your Anthurium is like conducting a symphony; each element harmonizes to create a thriving plant. Make sure you provide best lighting, a consistent watering schedule, appropriate temperatures, and high humidity.
Use well-draining soil, stay vigilant against pests and diseases, and propagate carefully. Seasonal adjustments are important for ongoing health.
By mastering these details, your Anthurium will flourish, displaying its stunning, vibrant blooms as a sign of your dedication and expertise.