Anthurium Propagation Reddit: Seven Steps to Success
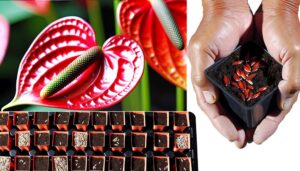
To successfully propagate Anthurium, gather sterilized pruning shears and a 15-20 cm pot. Select a healthy Anthurium with vibrant, unblemished leaves.
Prepare a well-draining potting mix of peat moss, pine bark, and perlite. Cut a 10-15 cm stem segment below a node using disinfected shears.
Apply rooting hormone like IBA to the cutting's base. Place near an east-facing window, maintaining 70-80% humidity.
Water regularly with distilled water, keeping the soil moist. Monitor for vibrant green leaves indicating healthy growth.
By mastering these steps, you're well on your way to lush Anthurium plants thriving in your care.
Key Takeaways
- Select a healthy parent plant with vibrant leaves and well-developed roots.
- Use a well-draining potting mix of peat moss, pine bark, and perlite.
- Make a clean cut below a node and apply rooting hormone for better root development.
- Maintain high humidity (70-80%) and provide indirect sunlight.
- Water regularly with distilled water, keeping the soil consistently moist.
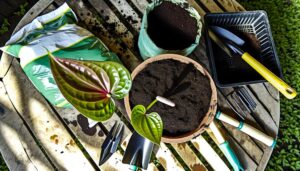
Gathering Materials
To begin propagating Anthurium, you'll need to gather essential materials. These include a pair of disinfected pruning shears, a clean pot with drainage holes, and a well-draining potting mix such as a blend of peat moss and perlite. Disinfect the pruning shears by soaking them in a 10% bleach solution for 10 minutes to prevent disease transmission.
Select a pot with a diameter of 15-20 centimeters to allow ample space for root growth. For the potting mix, combine two parts Sphagnum peat moss (Sphagnum spp.) with one part perlite (volcanic glass). Ensure the mix remains slightly acidic with a pH of 5.5-6.5 to promote ideal growth.
Gather all these materials before proceeding to the next step.
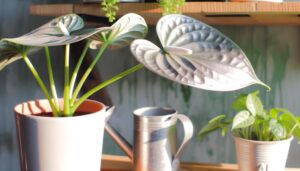
Choosing Healthy Parent Plant
When choosing a healthy parent plant for propagation, make sure the Anthurium (Anthurium spp.) displays vibrant, unblemished leaves and robust stem structure. Inspect foliage for signs of chlorosis or necrosis, confirming leaves are uniformly green and free from discoloration.
Evaluate the stem for turgidity and absence of lesions or fungal infections. Check the root system by gently lifting the plant from its pot; roots should be white, firm, and well-developed without signs of rot or pests.
Select a mature plant at least 30 cm in height, with multiple leaves and a well-established root ball. Healthy parent plants increase the likelihood of successful propagation and robust offspring. This careful selection minimizes propagation failure and guarantees vigorous growth in new plants.
Preparing the Soil
When preparing the soil for Anthurium propagation, you'll need a well-draining mix with a pH of 5.5 to 6.5.
Combine equal parts of peat moss, pine bark, and perlite for a best-suited blend.
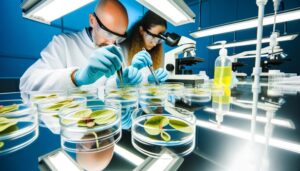
Sterilize the soil at 82°C for 30 minutes to eliminate pathogens and pests.
Choosing the Right Mix
Choosing the top soil mix for Anthurium propagation involves a mix of orchid bark, peat moss, and perlite to guarantee adequate aeration and drainage.
Start with 40% orchid bark (Orchidaceae), which offers a rough texture, improving root oxygenation. Include 30% peat moss (Sphagnum spp.), guaranteeing moisture retention without excess water. Lastly, mix in 30% perlite (a volcanic glass), which enhances drainage and prevents soil compaction.
These elements replicate the epiphytic behavior of Anthurium, closely resembling their natural living conditions. Make sure all components are thoroughly blended to create a uniform medium.
This specific proportion maximizes root health and encourages robust growth. By utilizing this exact blend, you'll give your Anthurium plants an optimal setting for successful propagation and long-lasting strength.
Sterilizing the Soil
Sterilizing the soil mix is essential to eliminate pathogens, pests, and weed seeds that could harm your Anthurium propagation efforts. Start by preheating your oven to 180°F (82°C). Spread your soil mix, which may include components like peat (Sphagnum spp.), perlite, and vermiculite, in an even layer on a baking sheet.
Heat the mixture for 30 minutes, ensuring it reaches an internal temperature of 160°F (71°C) to kill unwanted organisms. Alternatively, you can use a microwave-safe container, moistening the soil slightly and microwaving on high for 90 seconds per kilogram. Allow the soil to cool completely before use.
Cutting the Stem
To cut the stem of your Anthurium (Anthurium andraeanum), make a clean incision just below a node using a disinfected, sharp blade. A node is where leaves or aerial roots emerge, and cutting here promotes successful propagation. Make sure your cutting tool is disinfected with isopropyl alcohol to prevent contamination.
Aim for a cutting length of approximately 10-15 centimeters, including at least two nodes. Handle the stem carefully to avoid crushing or damaging it.
After making the cut, inspect the exposed tissue. It should appear healthy, with no signs of disease or pest infestation. Removing any lower leaves from the cutting minimizes water loss and focuses energy on root development.
Now, you're ready to move to the next step in the propagation process.
Applying Rooting Hormone
To enhance your Anthurium propagation success, you'll need to select a suitable rooting hormone such as indole-3-butyric acid (IBA) or naphthaleneacetic acid (NAA). Apply the hormone to the cut end of the stem, ensuring an even coating without excess.
For best results, maintain application precision at approximately 0.1% concentration.
Choosing the Right Hormone
Applying the appropriate rooting hormone, such as indole-3-butyric acid (IBA) or naphthaleneacetic acid (NAA), can greatly improve the root development in Anthurium cuttings. You need to understand the specific concentrations for effective results.
For IBA, a concentration of 1000 ppm (parts per million) is ideal, while NAA works well at around 500 ppm. These auxins stimulate cell elongation and differentiation, essential for successful rooting. Make sure you select high-quality, pure forms of these hormones to avoid contaminants that could impede growth.
Proper Application Techniques
Promoting best root development in Anthurium cuttings requires you to dip the base of each cutting into a rooting hormone solution with precise concentrations, such as 1000 ppm IBA or 500 ppm NAA. Accurately measure the hormone powder or liquid using a calibrated scale. Immerse the cut end about 1-2 cm into the solution for ideal absorption. After dipping, gently tap off any excess to prevent over-application. Place the treated cuttings on a clean surface to air-dry briefly before planting.
| Hormone Type | Concentration (ppm) | Immersion Depth (cm) |
|---|---|---|
| IBA | 1000 | 1-2 |
| NAA | 500 | 1-2 |
| IBA + NAA | 750 + 250 | 1-2 |
Following these steps guarantees your Anthurium cuttings develop strong root systems.
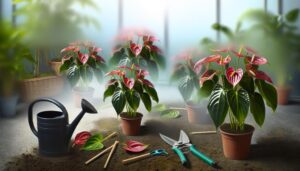
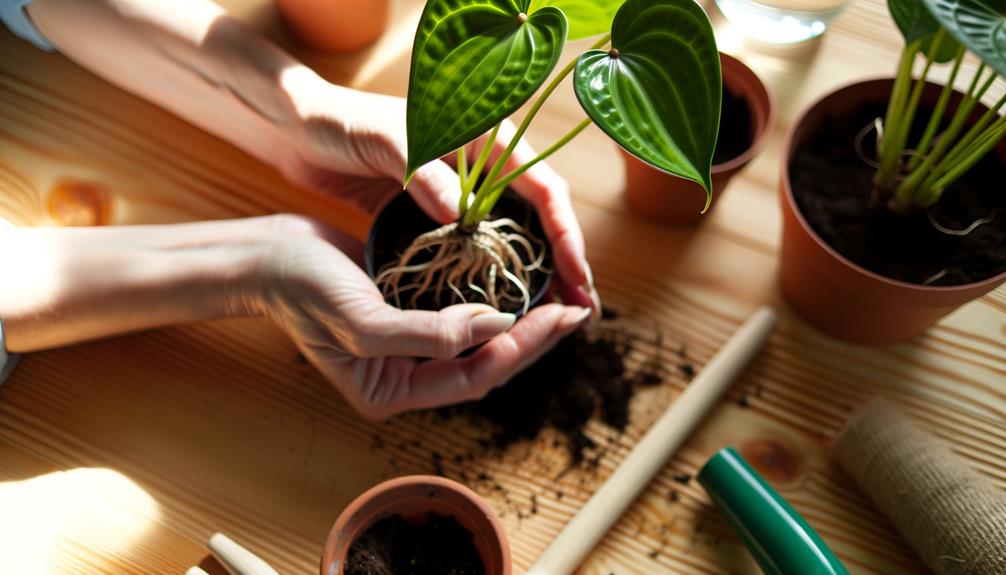
Potting the Cuttings
Once your Anthurium cuttings have developed roots of at least 2-3 inches, planting them in a well-draining potting mix, like a combination of orchid bark, peat moss, and perlite, is crucial.
Begin by choosing a pot with drainage holes to avoid water stagnation.
Fill the pot one-third full with the potting mix. Place the cutting in a way that the roots are evenly spread out. Add more potting mix until the roots are covered, making sure the base of the cutting stays above the soil line.
Gently compact the mix around the stem to remove air pockets.
Water the soil lightly, making sure it's moist but not waterlogged. This helps in promoting proper root aeration and prevents root rot (Rhizoctonia solani).
Ensuring Proper Lighting
When propagating Anthurium andraeanum, make sure the cuttings receive 12,000 to 20,000 lux of indirect light. Avoid placing them in direct sunlight, which can cause photoinhibition and leaf scorch.
Position your plants near a north-facing window or use sheer curtains to diffuse the light.
Optimal Light Levels
Anthurium plants flourish best under bright, indirect light, ideally within a range of 10,000 to 20,000 lux, to promote growth and vibrant foliage. You'll need to monitor light levels with a lux meter to ensure optimal conditions. Inadequate light can hinder growth and dim the leaves of Anthurium andraeanum.
Here's a quick reference table for ideal light levels:
| Light Intensity (Lux) | Description |
|---|---|
| 0 – 5,000 | Low light |
| 5,000 – 10,000 | Moderate light |
| 10,000 – 20,000 | Bright, indirect light |
| 20,000 – 50,000 | High light (filtered) |
| 50,000+ | Direct sunlight (avoid) |
Avoiding Direct Sunlight
Direct sunlight can scorch Anthurium andraeanum leaves, causing unsightly browning and potential damage to the plant. To avoid this, make sure your Anthurium receives bright, indirect light. Place it near an east-facing window where it will get morning sunlight without the harsh afternoon rays. If direct sunlight is unavoidable, use a sheer curtain to diffuse the light.
Anthuriums thrive in light levels of approximately 10,000 to 20,000 lux. Avoid positioning them in low-light conditions, as this can hinder growth and reduce flowering. Monitoring light intensity with a light meter can provide precise measurements.
Maintaining Humidity
Proper moisture levels are essential for the finest growth of Anthurium plants, requiring a consistent range of 70-80% relative humidity. To achieve this, you can use a hygrometer to monitor the ambient moisture levels closely.
Placing your Anthurium (Anthurium andraeanum) on a humidity tray filled with water and pebbles can help increase local humidity. Misting the leaves with distilled water is another effective method, but avoid over-saturating them to prevent fungal infections.
You might also consider using a humidifier, especially in drier climates or during winter months when indoor air tends to be less humid. By maintaining ideal humidity, you'll promote healthy foliage and vibrant blooms, ensuring your Anthurium thrives.
Regular Watering
In addition to maintaining ideal humidity levels, make certain you water your Anthurium andraeanum regularly, aiming for consistently moist but not waterlogged soil. Use distilled water at room temperature to prevent mineral buildup. Water when the top 1-2 cm of the potting medium feels dry to the touch.
Guarantee proper drainage by using a well-aerated medium with components like perlite or orchid bark. Avoid letting the plant sit in excess water, as it can cause root rot. During active growth phases, typically spring and summer, you might need to water more frequently. Conversely, reduce watering during the dormant period in fall and winter.
Monitoring moisture levels with a soil moisture meter can improve accuracy and prevent overwatering.
Monitoring Growth
Regularly assess the growth of your Anthurium andraeanum by noting leaf dimensions, root progress, and the emergence of new blossoms. Measure leaf dimensions in centimeters, observing any changes. Check root progress by gently lifting the plant and inspecting for healthy, white roots. New blossoms indicate successful propagation and optimal treatment.
| Parameter | Measurement/Observation |
|---|---|
| Leaf Dimensions | Measured in centimeters |
| Root Progress | Healthy, white roots |
| New Blossoms | Presence of new flowers |
| Overall Health | Vibrant green leaves |
Ensure your Anthurium receives indirect sunlight and maintains a temperature range of 20-28°C. Humidity should be around 70-80%, as the plant thrives in moist environments. By closely monitoring these variables, you'll guarantee your Anthurium andraeanum continues to flourish.
Troubleshooting Issues
While monitoring your Anthurium andraeanum's growth, you might encounter issues such as leaf yellowing, root rot, or lack of new blossoms.
Leaf yellowing often results from insufficient light or overwatering; make sure your plant receives bright, indirect light and allow the top 2-3 cm of soil to dry before watering.
Root rot, caused by pathogens like Pythium spp., can be mitigated by using a well-draining potting mix and avoiding waterlogged conditions.
If your Anthurium isn't blooming, verify that it's receiving 16 hours of light daily and maintain temperatures between 20-25°C. Also, use a balanced, water-soluble fertilizer (20-20-20) bi-monthly.
Keep humidity levels around 60-80% to promote best growth and flowering.
Sharing Success on Reddit
Sharing your Anthurium propagation success on Reddit can inspire others and provide valuable insights on techniques like division or stem cuttings (Anthurium andraeanum). Documenting your process with precise measurements (e.g., cutting lengths of 10-15 cm) and conditions (e.g., humidity levels of 80%) can help fellow enthusiasts replicate your success.
When you post, consider including:
- High-quality photos: Show root development stages.
- Detailed growth logs: Track daily humidity, temperature (23-27°C), and light exposure.
- Step-by-step instructions: Outline the exact propagation method you used.
Conclusion
Congratulations, you've successfully propagated your Anthurium! Remember, patience is key—Rome wasn't built in a day. Keep monitoring Anthurium andraeanum for signs of root development and new growth.
Maintain consistent moisture levels and guarantee indirect light. Share your progress on Reddit, inspire others, and exchange tips. With precise care, you'll enjoy a flourishing Anthurium collection.
Happy gardening!