Comprehensive Guide to Anthurium Angamarcanum Care
For Anthurium angamarcanum care, provide bright, indirect light to avoid leaf scorching. Maintain humidity at 70-80% with a humidifier if needed, and keep temperatures consistently between 65-80°F.
Water using low-salt, chlorine-free water when the top inch of soil is dry, mimicking tropical rainforest conditions. Use a well-draining, organic-rich soil mix like orchid bark, perlite, peat moss, and charcoal.
Fertilize with a balanced, water-soluble fertilizer every 4-6 weeks during the growing season. Regularly prune senescent leaves and monitor for pests like aphids and spider mites.
Ensure ideal conditions for your plant to truly flourish.
Key Takeaways
- Provide bright, indirect light and maintain humidity between 70-80%.
- Use low-salt, chlorine-free water and water when the top inch of soil is dry.
- Utilize a well-draining, organic-rich soil mix with orchid bark, perlite, and peat moss.
- Apply a balanced, diluted water-soluble fertilizer every 4-6 weeks during the growing season.
- Sterilize pruning shears, remove dead leaves, and inspect regularly for pests and diseases.
Light Requirements
Guaranteeing ideal growth for Anthurium angamarcanum requires providing bright, indirect light to mimic its natural understory habitat conditions. The key is to avoid direct sunlight, which can scorch the leaves.
Place your plant near a north or east-facing window, where it can receive ample yet diffused light. If natural light isn't sufficient, you can supplement with fluorescent or LED grow lights, maximizing they're positioned about 12-24 inches away from the plant.
It's important to monitor the leaf coloration; deep green leaves indicate prime lighting, while pale or yellowing leaves suggest too much light exposure. By maintaining these conditions, you'll optimize your Anthurium thrives, exhibiting robust growth and vibrant foliage.
Watering Schedule
When determining the best watering frequency for Anthurium angamarcanum, assess the moisture levels of the growing medium regularly.
You'll want to use water that's low in dissolved salts and chlorine to avoid root damage.
Monitoring these factors guarantees the plant receives peak hydration without compromising its health.
Ideal Watering Frequency
Determining the best watering frequency for Anthurium angamarcanum involves understanding its native habitat's moisture levels and mimicking those conditions closely. This species thrives in tropical rainforests, where humidity is high and the soil remains consistently moist but not waterlogged.
You should aim to water your Anthurium when the top inch of the substrate feels dry. Utilize a well-draining potting mix to prevent root rot, as these epiphytic plants require airflow around their roots.
During the growing season, typically spring to early autumn, increase the frequency of watering, ensuring that the medium stays evenly moist. In contrast, reduce watering during the dormant winter months.
Consistent monitoring and adjustment are essential to maintaining the best hydration and preventing both under-watering and over-watering.
Water Quality Preferences
For best growth, Anthurium angamarcanum requires water that's free from chlorine and heavy minerals, making rainwater or purified water ideal choices. Tap water often contains chlorine and hard minerals that can accumulate in the soil, causing root stress and nutrient lock-out.
To enhance your plant's health, consider the following:
- Use Rainwater: Collect and store rainwater to provide a natural, mineral-free water source.
- Purified Water: Purchase or produce purified water to guarantee purity and consistency.
- Water Filtration: Install a filtration system to remove chlorine and other impurities from tap water.
Ideal Humidity
Maintaining an ideal moisture level of 70-80% is important for the best growth and health of Anthurium angamarcanum. This epiphytic plant thrives in a consistently moist environment, replicating its native tropical habitat. You can achieve this by using a humidifier or placing the plant in a room with naturally high moisture, such as a bathroom with regular steam.
To check and maintain peak moisture, use a hygrometer. Avoid placing the plant near heaters or air conditioners that can dry out the air.
| Moisture Level | Impact on Plant | Recommended Action |
|---|---|---|
| Below 60% | Stunted growth, dry tips | Use a humidifier |
| 60-70% | Adequate but not optimal | Increase moisture if possible |
| 70-80% | Ideal growth conditions | Maintain current environment |
| Above 80% | Risk of fungal issues | Improve air circulation |
Keeping moisture within the ideal range ensures your Anthurium angamarcanum flourishes.
Temperature Needs
Alongside ideal humidity, Anthurium angamarcanum requires a stable temperature range between 65-80°F (18-27°C) to thrive. Maintaining this temperature is essential for best growth and health. Sudden temperature fluctuations can stress the plant, leading to stunted growth or leaf damage.
Here's what you should consider:
- Avoid drafts: Place the plant away from doors, windows, or HVAC vents to prevent exposure to cold or hot drafts.
- Consistent warmth: Ensure a consistently warm environment, especially during the winter months when indoor temperatures can drop.
- Monitor daily: Use a reliable thermometer to regularly check temperatures, making sure they stay within the ideal range.
Adhering to these guidelines will help your Anthurium angamarcanum flourish, promoting vibrant foliage and strong growth.
Soil Preferences
A well-draining, airy soil mix rich in organic matter is essential for the best growth of Anthurium angamarcanum. The ideal substrate should mimic the plant's natural epiphytic environment, allowing for ample root aeration and moisture retention without waterlogging. Utilize components like orchid bark, perlite, peat moss, and charcoal to create a balanced mix.
| Ingredient | Function | Ratio |
|---|---|---|
| Orchid Bark | Aeration and structure | 40% |
| Perlite | Drainage and aeration | 25% |
| Peat Moss | Moisture retention | 25% |
| Charcoal | Toxin absorption | 10% |
Regularly check the soil's pH, aiming for a slightly acidic range of 5.5 to 6.5. This specialized mix will support robust root development and overall plant health, ensuring your Anthurium thrives.
Fertilizing Tips
Utilize a balanced, water-soluble fertilizer, diluted to half-strength, to provide essential nutrients for your Anthurium angamarcanum during the growing season. This ensures optimal absorption of macro and micronutrients without risk of root burn. Apply the fertilizer every 4-6 weeks, focusing on the following key elements:
- Nitrogen (N): Promotes vigorous leaf growth and enhances chlorophyll production, vital for photosynthesis.
- Phosphorus (P): Supports strong root development and flowering, aiding in overall plant vitality.
- Potassium (K): Improves disease resistance and encourages healthy cell function, boosting the plant's resilience.
Remember to flush the soil with water occasionally to prevent salt build-up, which can impede nutrient uptake and harm your plant's health.
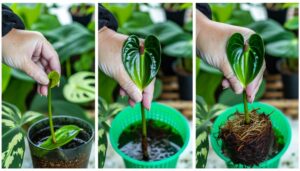
Repotting Guide
When repotting your Anthurium Angamarcanum, you should prioritize selecting a pot with sufficient drainage holes to prevent root rot.
Prepare a well-aerated soil mix incorporating orchid bark, perlite, and peat moss to mimic its natural epiphytic environment.
After repotting, make sure you maintain ideal humidity levels and avoid overwatering to facilitate root acclimation.
Choosing Correct Pot
Selecting the right pot for Anthurium angamarcanum involves considering factors such as pot size, drainage capabilities, and material to promote growth and health.
First, choose a pot that allows room for root expansion but isn't too large to avoid waterlogging risks.
Second, prioritize pots with excellent drainage to prevent root rot. Terracotta pots are ideal due to their porous nature, which enhances aeration and moisture regulation.
Here are three key considerations:
- Pot Size: Opt for a pot that's 1-2 inches larger in diameter than the current one.
- Drainage: Make sure the pot has multiple drainage holes to facilitate excess water escape.
- Material: Select porous materials like terracotta for enhanced root aeration and moisture control.
Soil Mix Preparation
For best growth, prepare a well-draining soil mix rich in organic matter and aerating components tailored for Anthurium angamarcanum. Combine equal parts orchid bark, sphagnum moss, and perlite. Orchid bark promotes structural integrity and aeration, preventing compacting.
Sphagnum moss retains moisture without waterlogging, crucial for root health. Perlite improves drainage, averting root rot. Optionally, add activated charcoal to absorb toxins and enhance soil health. Mix thoroughly to achieve a consistent texture.
When repotting, choose a pot with drainage holes. Gently remove the plant from its current container, shaking off old soil. Place it in the new pot, filling in with your prepared mix. Lightly press the soil around the roots to remove air pockets, ensuring steadiness.
Post-Repotting Care
After repotting your Anthurium angamarcanum, make certain it receives sufficient hydration by watering until the excess drains out, promoting healthy root establishment.
Post-repotting care is essential for acclimatization and involves several key steps:
- Humidity Control: Maintain ambient humidity levels between 70-80% to mirror its natural habitat, facilitating optimal leaf and root development.
- Light Conditions: Position the plant in bright, indirect light, avoiding direct sun exposure that could scorch its delicate foliage.
- Nutrient Supply: Apply a balanced, water-soluble fertilizer diluted to half strength every 4-6 weeks to support new growth without overwhelming the roots.
These steps guarantee that your Anthurium angamarcanum thrives post-repotting, adapting smoothly to its new environment.
Pruning Techniques
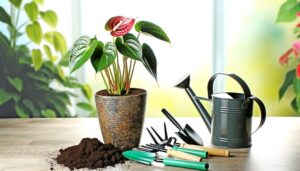
To maximize growth and health of your Anthurium angamarcanum, precise and timely pruning techniques are crucial. Begin by sterilizing your pruning shears to prevent pathogen transmission.
Focus on removing senescent leaves and spent inflorescences to direct nutrients toward vigorous growth. Make clean cuts at the leaf base to avoid tissue damage.
Regularly inspect for yellowing or necrotic foliage, pruning these parts to enhance aeration and light penetration. Additionally, thin out overcrowded sections to prevent etiolation and fungal infections.
Prune during the plant's active growth phase for best recovery. By adhering to these techniques, you'll encourage robust development and maintain the aesthetic appeal of your Anthurium angamarcanum.
Consistent pruning fosters resilience and longevity in your plant.
Pest Control
To maintain the health of your Anthurium angamarcanum, you'll need to address common insect pests such as aphids, spider mites, and mealybugs. Utilize natural pest solutions like neem oil and insecticidal soap to manage infestations effectively.
Implement preventive measures, including regular inspections and maintaining best humidity levels, to reduce the likelihood of pest issues.
Common Insect Pests
Dealing with common insect pests like aphids, mealybugs, and spider mites is essential for maintaining the health of your Anthurium angamarcanum. These pests can cause significant damage by feeding on plant sap, leading to weakened growth and yellowing leaves. Here are three critical points to bear in mind:
- Identification:
Inspect your plant regularly for signs of pests. Look for tiny, clustered bugs or webbing on the undersides of leaves.
- Isolation:
Quarantine affected plants immediately to prevent the spread to other houseplants.
- Chemical Treatments:
Use insecticidal soap or neem oil, applying it carefully to avoid phytotoxicity.
Natural Pest Solutions
Incorporating natural pest solutions, such as beneficial insects and organic sprays, can effectively manage pest populations on your Anthurium angamarcanum without resorting to harsh chemicals.
Introduce predatory mites (Phytoseiulus persimilis) to control spider mites, and ladybugs (Hippodamia convergens) to target aphids.
Utilize neem oil or insecticidal soap to combat a variety of pests, including mealybugs and scale insects. Guarantee uniform coverage by spraying both the upper and lower leaf surfaces.
Opt for diatomaceous earth to create a barrier against crawling insects. Regularly inspect your Anthurium for early signs of infestation, and apply these solutions promptly.
Preventive Measures
Regularly monitoring your Anthurium angamarcanum for early signs of pests and maintaining ideal plant health are essential steps in preventing infestations. Vigilance in these areas can notably reduce the risk of common pests like spider mites and aphids.
To safeguard your plant, follow these preventive measures:
- Inspect Weekly: Check leaves and stems for discolored spots, webbing, or small insects.
- Maintain Humidity: Keep humidity levels between 60-80%, as dry conditions attract pests.
- Clean Environment: Remove fallen leaves and debris from the plant's vicinity to deter hiding spots for pests.
Common Issues
When caring for Anthurium angamarcanum, you'll often encounter issues like root rot, leaf yellowing, and pest infestations.
Root rot typically results from overwatering or poor drainage, causing the roots to become mushy and blackened. To mitigate this, make sure well-aerated, fast-draining soil and avoid waterlogging.
Leaf yellowing could indicate nutrient deficiencies, such as nitrogen or iron, or improper light exposure. Check for balanced fertilization and adjust light conditions, guaranteeing indirect, bright light.
Pest infestations, including spider mites and mealybugs, can be managed by inspecting foliage regularly and applying insecticidal soap or neem oil. Maintain humidity levels around 60-80% to deter pests and support healthy leaf growth.
Identifying and addressing these issues promptly guarantees your Anthurium thrives.
Conclusion
Caring for Anthurium angamarcanum doesn't have to be overwhelming. By following the outlined steps—like maintaining a consistent watering schedule and ensuring best humidity—you'll see your plant thrive.
For instance, consider Jane, who transformed her struggling Anthurium by improving soil aeration and adjusting her watering technique.
With a bit of attention to detail and some botanical know-how, you can easily turn your Anthurium into a vibrant, healthy centerpiece in your home.

