How to Care for an Anthurium Plant With a Large Center Trunk
To care for an Anthurium with a large center trunk, choose a pot with drainage holes and fill it with a mix of orchid bark, perlite, and peat moss. Water thoroughly but make sure excess water drains.
Place the plant in bright, indirect light, maintaining temperatures between 65-80°F. Prune regularly using clean, sharp scissors, removing leaves near the trunk to prevent overcrowding.
Inspect weekly for pests like spider mites or aphids, treating with neem oil if necessary. Fertilize monthly during growing seasons.
Proper care ensures your Anthurium thrives; there's plenty more to master for best growth.
Key Takeaways
- Choose a sturdy pot with drainage holes to support the large center trunk and prevent waterlogging.
- Use a soil mix containing orchid bark, perlite, and peat moss for optimal drainage and nutrient supply.
- Place the plant in bright, indirect light and maintain temperatures between 65-80°F with stable humidity.
- Regularly prune dead or yellowing leaves and remove leaves near the center trunk to prevent overcrowding.
- Monitor for pests like spider mites and aphids, treating infestations promptly with neem oil or soapy water.
Choosing the Right Pot
When selecting a pot for your Anthurium, make certain it has sufficient drainage holes to prevent water from accumulating at the bottom. Excess water can lead to root rot, which is detrimental to the plant's health.
Choose a pot that's only slightly larger than the root ball. A snug fit helps the plant focus on healthy growth rather than excess root expansion. Terra cotta pots are ideal because they're porous, allowing for better air circulation.
Make sure the pot is sturdy to support the weight of the plant, especially if it has a large center trunk. Avoid using overly decorative pots without drainage, as they trap moisture.
Regularly check the drainage holes to confirm they're not blocked.
Ideal Soil Mix
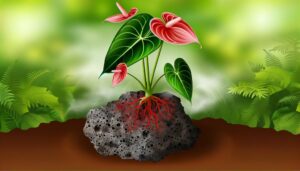
For the best soil mix, make sure you use a combination that provides excellent drainage, such as orchid bark, perlite, and peat moss.
This mix prevents waterlogging, which can cause root rot, while also supplying necessary nutrients.
Regularly check the soil's composition to maintain peak growth conditions for your Anthurium.
Proper Drainage Essentials
An ideal soil mix for anthurium plants requires a blend that provides excellent drainage while retaining enough moisture to support their tropical roots. Use a mix of equal parts orchid bark, peat moss, and perlite.
The orchid bark guarantees air circulation around the roots, preventing root rot. Peat moss retains moisture, helping keep the roots hydrated without waterlogging. Perlite enhances drainage, preventing soil compaction and facilitating healthy root growth.
When potting, make sure the container has drainage holes to allow excess water to escape. Place a layer of gravel or broken pottery at the bottom of the pot to further improve drainage.
Nutrient-Rich Ingredients
To guarantee your anthurium plant receives the nutrients it needs, incorporate a blend of high-quality organic materials like compost, worm castings, and slow-release fertilizers into the soil. Start by using a well-draining potting mix as a base, preferably one containing peat moss or coconut coir.
Add compost to provide essential nutrients and worm castings to enhance soil structure and microbial activity. Include perlite or orchid bark for aeration. Integrate a slow-release fertilizer to maximize the supply of nutrients over time.
Adjust the pH to slightly acidic, ideally between 5.5 and 6.5, for peak nutrient uptake. Regularly check the soil's moisture and nutrient levels to maintain a healthy anthurium environment.
Proper Watering Routine
Maintaining a proper watering routine for your anthurium involves ensuring the soil remains consistently moist but never waterlogged. Water your plant thoroughly, allowing excess water to drain out.
Use lukewarm water to prevent shocking the roots. Check the top inch of the soil; if it feels dry, it's time to water.
Remember to:
- Monitor humidity levels: Anthuriums thrive in 60-80% humidity.
- Avoid overwatering: Too much water can cause root rot.
- Water less in winter: Growth slows down, so the plant needs less water.
- Use a well-draining potting mix: This prevents water from accumulating.
- Employ a consistent schedule: Watering once a week is typically sufficient.
Optimal Light Conditions
Anthuriums need bright, indirect light to thrive, so place your plant close to a window where it can receive filtered sunlight throughout the day. Avoid direct sunlight, as it can burn the leaves. East or north-facing windows are optimal, offering sufficient light without the strength that can cause harm.
If natural light is inadequate, consider using fluorescent or LED grow lights. Position these lights about 12 inches above the plant and run them for 12-14 hours daily. Regularly rotate your Anthurium to guarantee uniform light distribution and prevent uneven growth.
Watch the foliage closely; pale leaves indicate excessive light, while dark, stretched growth suggests insufficient light. Adjust the light exposure accordingly to sustain a healthy, lively plant.
Temperature and Humidity
To sustain your Anthurium thriving, maintain a temperature range of 65-80°F and avoid sudden temperature fluctuations.
Guarantee the humidity level is at least 60%, preferably by using a humidifier or misting the plant regularly.
Consistent environmental conditions will help the plant stay healthy and vibrant.
Ideal Temperature Range
For best development, make certain your anthurium plant is positioned in an environment with temperatures ranging from 65°F to 80°F and humidity levels between 60% and 80%. Keeping the temperature within this range ensures peak metabolic processes, while high humidity prevents leaf desiccation.
To uphold these conditions:
- Monitor ambient temperature: Use a reliable thermometer to check your room's temperature regularly.
- Avoid cold drafts: Keep the plant away from windows and doors that open frequently.
- Use a humidifier: If your home's humidity is low, a humidifier can help maintain the right levels.
- Group plants together: This can naturally increase humidity.
- Keep away from heat sources: Don't place your anthurium near radiators or vents.
Maintaining Humidity Levels
Ensuring your anthurium thrives involves maintaining consistent humidity levels, which can be achieved through several practical methods. Aim for a humidity range of 70-80%. Use a humidifier, mist the leaves regularly, or place a tray with water and pebbles beneath the pot to increase moisture. Grouping plants together also helps create a micro-environment with higher humidity. Here's a quick reference:
| Method | Description |
|---|---|
| Humidifier | Set it near the plant to maintain desired humidity levels. |
| Misting | Mist leaves daily to mimic a tropical environment. |
| Pebble Tray | Place pot on a tray filled with water and pebbles. |
| Grouping Plants | Cluster plants to naturally boost humidity. |
Avoiding Temperature Fluctuations
Maintaining consistent temperature levels is just as important as humidity for anthurium health, as temperature fluctuations can stress the plant and hinder its growth. Aim to keep temperatures between 70-85°F (21-29°C) during the day and around 60-70°F (15-21°C) at night. Avoid placing your anthurium near drafts, heating vents, or air conditioning units. Sudden changes can cause leaf yellowing or drop.
Consider the following tips:
- Monitor room temperature regularly with a reliable thermometer.
- Use a humidifier if the air is too dry.
- Place the plant away from windows that receive direct cold drafts.
- Avoid abrupt temperature changes by keeping it in a stable environment.
- Group plants together to create a microclimate with stable conditions.
Fertilizing Tips
To promote vibrant growth, apply a balanced, water-soluble fertilizer to your anthurium every six to eight weeks during the growing season. Choose a fertilizer with an equal ratio of nitrogen, phosphorus, and potassium (such as 20-20-20) for ideal nutrient distribution.
Dilute the fertilizer to half the recommended strength to prevent over-fertilization, which can harm the plant. Apply the solution directly to the soil, ensuring even coverage around the base of the plant. Avoid getting the fertilizer on the leaves to prevent potential burn.
Monitor the plant for signs of nutrient deficiency, such as yellowing leaves or stunted growth, and adjust your fertilization schedule accordingly. Regular, precise feeding fosters robust foliage and vibrant blooms.
Pruning and Maintenance
Regularly trim dead or yellowing leaves from your anthurium to maintain its health and encourage new growth. Use sharp, clean scissors or pruning shears to make precise cuts. Focus on removing leaves close to the center trunk to prevent overcrowding. Monitor your plant for any leggy growth and trim back to encourage a fuller appearance.
Inspect weekly: Check for dead or yellowing leaves to promptly remove.
Sterilize tools: Clean scissors or shears with rubbing alcohol before use.
Cut at base: Trim leaves at the base, close to the trunk, for a clean look.
Thin crowded areas: Remove excess leaves to improve air circulation.
Shape regularly: Prune to maintain the desired shape and size of your anthurium.
Maintaining a consistent pruning routine will keep your anthurium thriving.
Common Pests and Diseases
Anthurium plants are vulnerable to a range of pests and diseases that can impede their growth and well-being. Spider mites, aphids, and mealybugs are common pests that can infest your plant, causing yellowing leaves and stunted growth. Treat infestations by wiping leaves with a solution of water and gentle soap, or use neem oil as a natural pesticide.
Root rot and fungal infections, often caused by overwatering, manifest as blackened roots and wilted leaves. To prevent these issues, ensure adequate drainage and avoid waterlogged soil. If you observe signs of disease, remove affected parts and repot the plant in fresh, sterile soil.
Regular monitoring and prompt action maintain the health and vitality of your anthurium.
Conclusion
By adhering to these detailed care guidelines, you'll transform your anthurium into a thriving centerpiece. Remember, it's the little things—choosing the right pot, maintaining best light, and ensuring proper watering—that make a big difference.
Your commitment will be rewarded with a healthy, vibrant plant free of common pests and diseases. Think of each step as a brushstroke in a masterpiece, creating a living work of art in your home.
Happy gardening!

