How to Revive My Dying Anthurium Plant
To revive your dying Anthurium, first identify issues like chlorosis or root rot. Use a moisture meter to guarantee proper watering; avoid overwatering and use well-draining pots.
Place the plant in indirect light and rotate it regularly. Maintain 60-80% humidity with a humidifier or pebble tray.
Inspect for pests like aphids or mealybugs, treating as needed. Trim any necrotic foliage and repot if roots are crowded or decayed.
Fertilize with a diluted, balanced fertilizer every 4-6 weeks. Securing these conditions will greatly improve your Anthurium's health.
For in-depth strategies and precise techniques, there's more to explore.

Key Takeaways
- Check soil moisture with a moisture meter and adjust the watering schedule to avoid overwatering or underwatering.
- Place the Anthurium in a spot with filtered light and rotate it regularly for even light exposure.
- Maintain humidity levels between 60-80% using a humidifier or a water-filled pebble tray.
- Inspect for pests like aphids, mealybugs, and spider mites, and treat with appropriate insecticides if necessary.
- Repot the Anthurium in a well-draining medium if roots are overcrowded or protruding, and trim any decayed roots.
Identify the Problem
To begin reviving your Anthurium plant, first, you must accurately identify the problem by examining its leaves, roots, and overall growth patterns. Look for chlorosis, where leaves turn yellow, indicating nutrient deficiencies or improper pH levels.
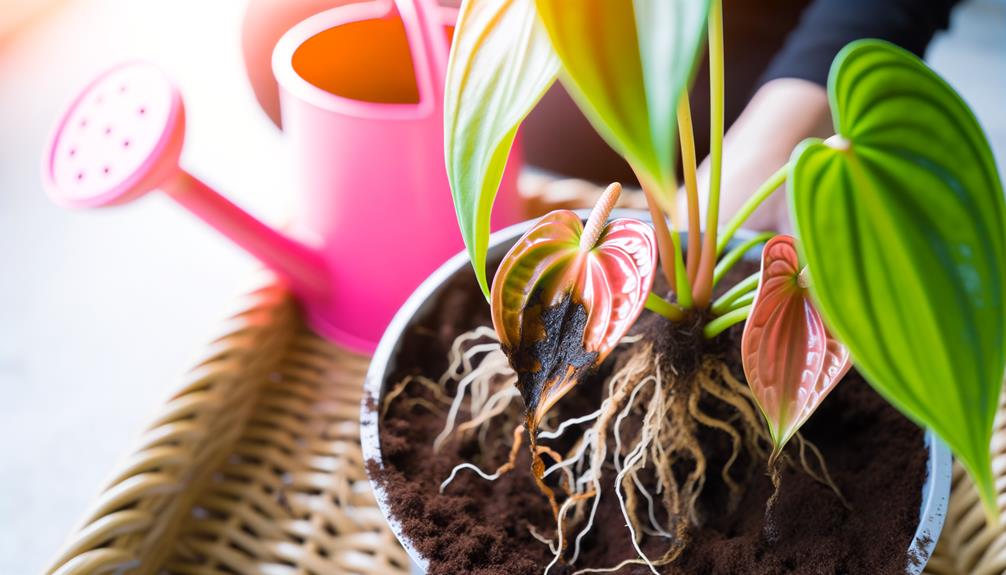
Check for necrosis, characterized by dead, brown leaf tips, often due to low humidity or over-fertilization. Inspect the roots for signs of rot, such as a mushy texture and dark discoloration, which typically results from waterlogged soil.
Assess the plant's overall structure for etiolation, where stems elongate unnaturally due to insufficient light. By diagnosing these physiological symptoms, you can pinpoint specific issues affecting your Anthurium and take targeted actions to address them.
Understanding these indicators is essential for effective plant revival.
Check Watering Routine
Evaluating your watering schedule is important, as both overwatering and underwatering can significantly affect the health of your Anthurium plant. You should make sure that the soil remains consistently moist but not waterlogged. Overwatering can lead to root rot, while underwatering can cause dehydration and nutrient deficiencies.
To achieve the best balance, consider these key points:
- Check soil moisture: Use a moisture meter or insert your finger an inch into the soil.
- Drainage: Ensure pots have drainage holes to prevent excess water accumulation.
- Watering frequency: Water approximately once a week, adjusting based on humidity and temperature.
- Water quality: Use filtered or rainwater to avoid mineral buildup.
- Humidity: Maintain high humidity levels around the plant, ideally between 60-80%.
Assess Light Conditions
You'll need to evaluate the light conditions your Anthurium is experiencing. Best light levels are essential; the plant thrives in bright, indirect light but can suffer under direct sunlight.
Consider adjusting its indoor placement to guarantee it receives filtered light, which will help prevent leaf scorch and promote healthy growth.
Optimal Light Levels
How do you determine if your Anthurium is receiving the best light levels it needs for healthy growth?
First, assess the plant's position relative to windows. Anthuriums thrive in bright, indirect light. Observe the foliage for signs of light stress: yellowing leaves suggest too much light, while dark green leaves indicate insufficient light.
Utilize a light meter to measure foot-candles; ideal levels range between 2000-2500 foot-candles.
Consider the following adjustments:
- Relocate to a spot with filtered light.
- Rotate the plant to ensure even light distribution.
- Adjust window treatments to modulate light intensity.
- Monitor leaf color and growth rate regularly.
- Utilize artificial grow lights if natural light is insufficient.
These steps ensure your Anthurium receives the proper light for best health.
Avoid Direct Sunlight
Ensuring your Anthurium avoids direct sunlight is essential, as intense rays can scorch the leaves and hinder photosynthesis. Anthuriums thrive in bright, indirect light, which mimics their natural understory habitat.
Direct sunlight leads to photoinhibition, where chlorophyll is damaged, reducing the plant's ability to synthesize food. The leaves may exhibit chlorosis, turning yellow or brown due to cell breakdown.
Monitor light intensity using a light meter, aiming for 10,000 to 20,000 lux. If you notice leaf curling or browning, it indicates excessive light exposure. Place your hand between the plant and the light source; if it casts a sharp shadow, the light is too strong.
Adjust Indoor Placement
Place your Anthurium in a location where it receives bright, indirect light to mimic its natural understory conditions and maximize photosynthesis. Direct sunlight can cause photoinhibition, leading to chlorophyll degradation and leaf scorch. Conversely, insufficient light impairs the plant's ability to carry out photosynthesis efficiently, resulting in stunted growth and poor foliage quality.
To achieve top light conditions, consider the following:
- East or North-facing windows: They provide sufficient but gentle light.
- Sheer curtains: Diffuse strong sunlight, preventing leaf damage.
- Grow lights: Supplement natural light, especially during winter months.
- Periodic rotation: Ensures even light distribution across all leaves.
- Light meters: Monitor light intensity to maintain ideal conditions.
Evaluate Humidity Levels
Humidity plays a crucial role in the physiological health of anthurium plants, directly impacting their transpiration and overall well-being. You'll need to maintain a relative humidity level between 60-80% to ensure best growth. Low humidity can cause leaf browning and reduced transpiration efficiency. Use a hygrometer to measure humidity and employ a humidifier if needed. Grouping plants or placing them on a water-filled pebble tray can also increase local humidity.
| Humidity Level (%) | Plant Condition |
|---|---|
| < 40% | Leaf browning, wilting |
| 40-60% | Suboptimal growth |
| 60-80% | Best growth and health |
| 80-90% | Potential fungal issues |
| > 90% | High risk of rot |
Regularly monitor and adjust to keep your anthurium thriving.
Inspect for Pests
Why is it essential to inspect your anthurium regularly for pests like aphids, mealybugs, and spider mites? These pests can cause significant damage to your plant by feeding on the sap, leading to weakened structures, stunted growth, and potential death. Regular inspections allow you to catch infestations early and apply appropriate treatments.
Look for these signs during your inspection:
- Discolored or misshapen leaves: Indicate feeding damage or disease transmission.
- Sticky residue on leaves: Commonly known as honeydew, produced by aphids and mealybugs.
- Webbing: Often a sign of spider mite presence.
- Small insects on the undersides of leaves: A thorough check reveals hidden pests.
- Declining plant vigor: An overall decrease in plant health suggests pest activity.
Examine Soil Quality
One critical aspect of reviving your anthurium is confirming the soil quality meets the plant's specific needs for aeration, drainage, and nutrient content. Anthuriums thrive in a well-aerated, loose medium. They prefer a mix that includes orchid bark, perlite, and peat moss. This combination guarantees adequate drainage, preventing root rot—a common issue in anthuriums.
Check the soil pH; it should be slightly acidic, ideally between 5.5 and 6.5. Poor soil aeration can lead to compaction, hindering root respiration and nutrient uptake. If the soil feels dense or waterlogged, repotting in fresh, appropriate soil is essential.
Additionally, avoid using heavy, clay-based soils as they retain too much moisture and lack necessary air pockets for healthy root growth.
Prune Damaged Leaves
To rejuvenate your anthurium, start by pruning any damaged, yellowing, or diseased leaves to redirect the plant's energy towards new growth. Use sterilized pruning shears to make clean cuts at the base of the affected leaves. This minimizes the risk of infection and promotes efficient nutrient allocation. Don't be afraid to remove heavily damaged leaves; the plant will recover faster.
Key points to bear in mind:
- Sterilize tools: Prevent disease transmission.
- Cut at the base: Enhance nutrient flow.
- Remove yellow leaves: Promote healthier foliage.
- Inspect regularly: Catch issues early.
- Dispose properly: Avoid spreading pathogens.
Proper pruning encourages robust growth and helps your anthurium focus on producing vibrant, healthy leaves, ultimately reviving its overall vigor.
Repot if Necessary
If your anthurium appears overcrowded or roots are protruding from the drainage holes, it's time to think about repotting for the best growth and health.
Select a pot one size larger than the current one to provide adequate space for root expansion. Use a well-draining, airy medium like a mix of orchid bark, peat, and perlite to prevent root rot and ensure proper aeration.
Gently remove the plant from its existing pot, shake off excess soil, and inspect the root system for any signs of decay. Trim any dead or rotten roots with sterilized scissors before placing the plant in the new pot.
Water thoroughly after repotting to help the plant settle into its new environment.
Fertilize Properly
During the growing season, apply a balanced, water-soluble fertilizer at half potency every four to six weeks to provide necessary nutrients for your anthurium's optimal health and growth. This guarantees that the plant receives essential macro and micronutrients without the risk of over-fertilization, which can harm its roots.
Key points to keep in mind:
- Dilution Rate: Always use the fertilizer at half the suggested strength.
- Frequency: Stick to a schedule of every four to six weeks.
- Nutrient Balance: Opt for a balanced N-P-K ratio (e.g., 10-10-10).
- Application Method: Incorporate into regular watering routine.
- Observation: Monitor for signs of nutrient deficiency or excess.
Proper fertilization is pivotal for photosynthesis, root development, and overall vigor.
Conclusion
To revive your anthurium, closely monitor its needs, as 70% of houseplant deaths stem from improper care. Guarantee ideal watering, light, and humidity; examine for pests and evaluate soil quality.
Trim damaged leaves and repot if needed. Don't overlook to fertilize properly—your plant will thank you.
With these expert suggestions, your anthurium can flourish once more, displaying its vibrant, heart-shaped blooms. Remember, attentive care is crucial to plant health and longevity.


