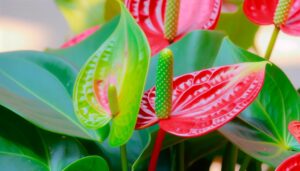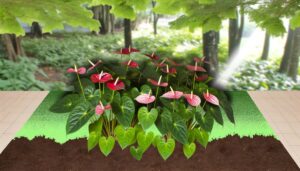
How to Save and Propagate a Good Anthurium Plant Leaf Branch That Broke Off
To conserve and spread a damaged Anthurium leaf branch, first examine for turgor, chlorosis, and necrotic tissue. Clean the fractured end using sterilized pruning shears and make a neat, slanted cut just below a node.
Apply rooting hormone and plant the cutting in a pre-moistened, sterilized medium like Sphagnum Moss. Place in a humid environment with indirect light and proper air circulation.
Regularly check soil moisture and maintain humidity around 70-80%. Once roots are 1-2 inches long, transplant into nutrient-rich, well-draining potting mix and monitor closely.
There's more you can learn to ensure peak growth and health of your Anthurium.
Key Takeaways
- Examine the broken branch for damage and remove unhealthy tissue with sterilized tools.
- Make a clean diagonal cut below a node and use rooting hormone to stimulate root growth.
- Plant the cutting in a pre-moistened, well-draining medium like Sphagnum Moss or Perlite.
- Keep the cutting in bright, indirect light with high humidity (70-80%) and consistent soil moisture.
- Monitor root development and transplant into nutrient-rich potting mix once roots are 1-2 inches long.
Assess the Damage
Begin by carefully examining the Anthurium plant branch for visible signs of damage, such as discoloration, wilting, or structural breaks. Inspect both the leaves and the stem.
Look for chlorosis, which manifests as yellowing leaves, indicating potential nutrient deficiencies or stress. Check for necrotic tissue, where parts of the leaf or stem appear blackened or brown, signifying dead plant material.
Assess turgidity by gently pressing the stem; a healthy stem should feel firm, while a damaged one may feel soft or mushy. Evaluate any structural breaks by gently bending the branch; if it snaps or shows a clean break, it may be more challenging to save.
Document all findings to determine the best course of action for propagation.
Gather Necessary Tools
To guarantee successful propagation, gather essential gardening tools such as sterilized pruning shears, a clean pot, and fresh potting mix.
Preparing cutting supplies involves disinfecting your tools with isopropyl alcohol to prevent pathogen transmission. Additionally, have rooting hormone and a spray bottle with water ready for peak cutting conditions.
Essential Gardening Tools
For propagating your Anthurium plant branch, make sure you have sharp trimming shears, a sanitized trowel, rooting stimulant, and uncontaminated potting mix ready.
Sharp trimming shears guarantee a clean cut, minimizing tissue damage and reducing infection risk. A sanitized trowel aids in precise soil placement, maintaining ideal root contact.
Rooting stimulant, rich in auxins, enhances cell division, promoting strong root formation. Uncontaminated potting mix, free from pathogens and pollutants, provides a conducive environment for root development.
Additionally, prepare a small, disinfected container with drainage holes to prevent waterlogging, which can cause root decay. Proper tools and materials are essential for successful propagation, ensuring the Anthurium branch establishes itself as a healthy, independent plant.
Preparing Cutting Supplies
Make sure you gather all necessary tools, including sanitized trimming shears, a clean trowel, rooting hormone, and pathogen-free potting mix, to prepare for cutting and propagating your Anthurium branch.
Begin by sterilizing your trimming shears with rubbing alcohol to prevent any potential contamination.
Use a clean trowel to fill a small pot with pathogen-free potting mix, ensuring good drainage.
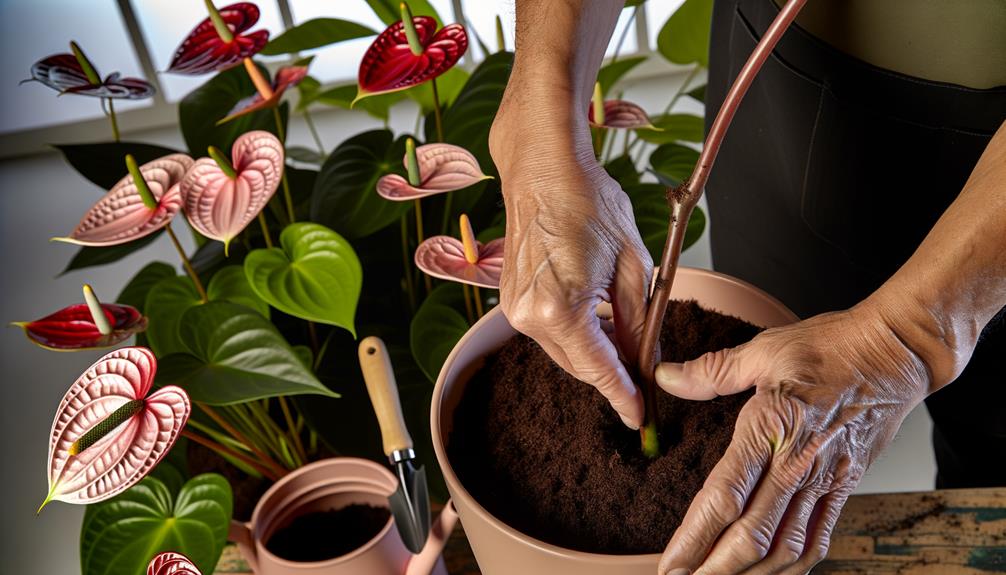
Dip the cut end of the Anthurium branch into rooting hormone to promote root development.
Carefully plant the treated cutting into the prepared potting mix, ensuring it's secure and upright.
Maintain a humid environment by covering the pot with a plastic bag or placing it in a propagation dome.
Regularly monitor moisture levels to prevent desiccation.
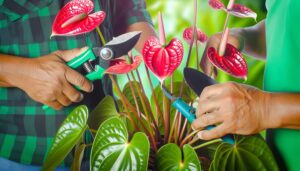
Clean the Broken End
Make certain you use a sterilized, sharp knife or pruning shears to trim away any damaged or decayed tissue from the broken end of the Anthurium branch. This guarantees the removal of any necrotic tissue, which could harbor pathogens. Disinfect your cutting tool with isopropyl alcohol to prevent contamination.
Make a clean, diagonal cut just below a node, as this maximizes surface area for rooting. Avoid crushing or tearing the plant tissue, as this can impede the healing process and increase susceptibility to infection.
Inspect the cut end for any signs of disease, such as discoloration or soft spots. If present, remove additional tissue until only healthy, green, and firm tissue remains. This preparation is essential for successful propagation.
Choose Rooting Medium
Selecting the appropriate rooting medium is essential for ensuring successful propagation of your Anthurium plant branch. You need a medium that provides aeration, retains moisture, and supports root formation.
Consider these options:
- Sphagnum Moss: Offers excellent moisture retention and aeration, ideal for maintaining humidity.
- Perlite: Lightweight and promotes drainage, preventing root rot.
- Coconut Coir: Sustainable alternative with good water retention and aeration properties.
- Vermiculite: Enhances moisture retention and aeration, creating a stable environment for roots.
- Mix of Peat and Perlite: Balances moisture retention and drainage, suitable for developing healthy roots.
Select a sterilized medium to minimize pathogens. Moisten the medium adequately before planting to optimize conditions for root development. Each medium presents unique benefits, so choose based on your specific propagation setup.
Plant the Leaf Branch
When planting the Anthurium leaf branch, it is important to select a well-draining, nutrient-rich potting mix to support root development.
Monitor soil moisture levels consistently, ensuring the medium remains moist but not waterlogged to prevent root rot.
Position the plant in an area with indirect, bright light to facilitate the best photosynthesis and growth.
Choose Suitable Soil
To maximize growth for your Anthurium plant branch, you should select a well-draining soil mix rich in organic matter and with a slightly acidic pH. This creates the best environment for root development and nutrient uptake. Aim for a pH range between 5.5 and 6.5.
Combine ingredients to create a balanced medium:
- Peat moss: Enhances moisture retention while maintaining acidity.
- Pine bark: Provides excellent aeration and promotes root expansion.
- Perlite: Improves drainage and prevents soil compaction.
- Activated charcoal: Helps in detoxifying the soil and preventing root rot.
- Compost: Supplies essential nutrients and beneficial microorganisms.
Mix these components thoroughly to create an ideal substrate. This tailored soil mix will support robust growth and ensure your Anthurium branch thrives.
Maintain Proper Moisture
After preparing the ideal soil mix, plant the Anthurium branch at the correct depth to maintain proper moisture levels for best root development. Insert the branch into the soil so that at least one node is submerged. Firmly press the soil around the base to eliminate air pockets, which can impede water absorption.
Water the soil thoroughly, ensuring it's moist but not waterlogged. Use a well-draining pot to prevent root rot caused by excess water. Maintain a consistent moisture level by checking the soil's top inch; it should remain slightly damp. Avoid letting the soil dry out completely as this can stress the plant.
Regularly mist the leaves to increase ambient humidity, promoting excellent growth conditions.
Ensure Adequate Light
Position your Anthurium in a location where it receives bright, indirect sunlight for ideal photosynthesis and growth. Direct sunlight can scorch the leaves, while insufficient light hampers chlorophyll production, leading to poor health. Make sure the light intensity ranges between 10,000 to 20,000 lux for best results. Use a light meter to measure the light levels accurately.
Avoid direct sunlight: Prevents leaf scorch and stress.
Rotate the plant: Ensures even light distribution and balanced growth.
Supplement with artificial light: Use full-spectrum grow lights if natural light is insufficient.
Monitor light duration: Aim for 10–12 hours of light daily to mimic natural conditions.
Adjust seasonally: Modify light exposure as daylight hours change throughout the year.
Consistent light management promotes robust Anthurium propagation.
Maintain Optimal Conditions
Securing the thriving of your Anthurium plant requires meticulous attention to light, temperature, and humidity levels. Maintain a consistent temperature range of 70-85°F (21-29°C) during the day and no lower than 60°F (15°C) at night.
Anthuriums prefer high humidity, ideally between 70-80%. To achieve this, use a humidifier, or place the plant on a tray filled with water and pebbles, making sure the pot doesn't sit directly in the water. Avoid drafts and sudden temperature fluctuations which can stress the plant.
Provide bright, indirect light to prevent leaf scorching. You should also guarantee proper air circulation without exposing the plant to direct airflow from air conditioners or heaters. This careful balance optimizes growth conditions and supports robust propagation.
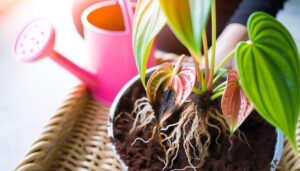
Monitor Root Development
Once you've fine-tuned the environmental conditions, closely inspect the root system to ensure healthy development and avoid any signs of rot or disease. Regular monitoring is essential for a successful propagation process. Look for the following indicators to achieve optimal root growth:
- Root Color: Healthy roots should be white or light tan. Dark, mushy roots indicate rot.
- Root Length: Roots should be at least 1-2 inches long before considering transplantation.
- Root Density: A robust root system will have multiple roots growing from the node.
- Root Texture: Healthy roots are firm and turgid, not soft or shriveled.
- Signs of Disease: Check for any discoloration, foul odor, or fungal growth, which are signs of infection.
Transplant to a Pot
After confirming the root system is healthy, gently remove the cutting from its current medium and prepare to transplant it into a pot filled with a well-draining, nutrient-rich potting mix.
Choose a pot with drainage holes to prevent waterlogging. Fill it halfway with a mix of perlite, peat moss, and orchid bark. Place the Anthurium cutting in the center, ensuring roots are spread evenly. Add more potting mix to cover the roots, pressing lightly to secure the plant.
Water thoroughly until excess drains out. Place the pot in indirect light, maintaining humidity around 60-80%. Monitor soil moisture, keeping it consistently damp but not soggy to promote root establishment and vigorous growth.
Conclusion
To sum up, effectively propagating an Anthurium leaf branch can be accomplished with meticulous attention to detail.
Were you aware that Anthuriums can bloom for up to 8 weeks, making them an enduring addition to your indoor garden?
By following these steps—evaluating damage, cleansing the fractured end, selecting the appropriate rooting medium, and maintaining ideal conditions—you'll guarantee strong root development.
With patience and proper care, your new Anthurium plant will flourish.