How to Treat Infested New Leaves on Your Anthurium Plant
To treat infested new leaves on your Anthurium plant, start by inspecting and isolating the plant to prevent spread. Identify common pests like aphids, mealybugs, spider mites, or scale insects.
Use natural remedies such as neem oil or insecticidal soap. Clean leaves with a mild soap and water solution, then let them air dry in the shade.
Prune infested leaves with sterilized tools and boost plant immunity through balanced fertilization, consistent watering, and best lighting. Maintain regular hygiene practices and quarantine new plants to prevent future infestations.
For a detailed guide on keeping your Anthurium healthy, explore further insights.
Key Takeaways
- Inspect new leaves thoroughly for pests and signs of damage, and isolate the infested plant.
- Clean the leaves with a mild soap and water solution, then allow them to air dry completely.
- Apply natural remedies like neem oil or insecticidal soap to treat the infestation.
- Prune infested leaves using sterilized tools to prevent the spread of pests.
- Enhance plant immunity with balanced fertilization, consistent watering, and optimal lighting conditions.
Identify Common Pests
To effectively treat infested new leaves on your Anthurium plant, you must first identify common pests such as aphids, mealybugs, spider mites, and scale insects.
Aphids are small, pear-shaped insects that cluster on leaves and stems.
Mealybugs appear as white, cotton-like masses often found in leaf axils.
Spider mites are tiny and create fine webbing, usually visible on the undersides of leaves.
Scale insects are immobile, appearing as small, round or oval bumps on stems and leaves.
Recognizing these pests is essential for effective treatment. Each pest may require a different approach, so accurate identification ensures you apply the right method.
Precise identification helps prevent further damage and promotes the health of your Anthurium.
Inspect Your Anthurium
Start by thoroughly inspecting your Anthurium, paying close attention to the undersides of the leaves where pests often hide. Look for any signs of discoloration, which can indicate infestation or disease.
Identifying common pests early, such as aphids or spider mites, is essential for effective treatment.
Check Leaf Undersides
Begin your inspection by carefully examining the undersides of your Anthurium's new leaves, where pests and infestations often hide. You'll need a well-lit area to perform a thorough check. Use a magnifying glass to spot tiny invaders that are otherwise hard to see.
Here's what you should look for:
- Webbing or Silk Threads: Presence of fine webbing indicates spider mites.
- Small, Crawling Insects: Aphids, mealybugs, and thrips can often be found on the leaf undersides.
- Sticky Residue: Honeydew secretion is a sign of sap-sucking pests like aphids and scale insects.
Identifying these signs early allows you to take swift action, preventing the infestation from spreading to healthy parts of your plant.
Look for Discoloration
After examining the leaf undersides, turn your attention to any discoloration on your Anthurium's new leaves, which can indicate various types of pest damage or nutrient deficiencies.
Look for yellowing, browning, or mottled patterns. Yellowing often signals nutrient deficiencies, particularly nitrogen, while browning edges might suggest potassium deficiency or overexposure to direct sunlight. Mottled patterns, on the other hand, frequently point to pest activity, such as spider mites or thrips.
Pay close attention to any unusual color shifts, as these changes can be early indicators of a problem. Make sure you have adequate lighting to detect even subtle discoloration.
Accurate identification allows for prompt treatment, preventing further damage and promoting best plant health.
Identify Common Pests
To effectively manage pest issues on your Anthurium, meticulously inspect the plant for common culprits like aphids, spider mites, mealybugs, and thrips. Begin by examining the undersides of leaves and stems where these pests often hide. Use a magnifying glass for a closer look.
Look for:
- Aphids: Small, pear-shaped insects that cluster on new growth, excreting sticky honeydew.
- Spider Mites: Tiny, spider-like creatures that create fine webs, leading to speckled or discolored leaves.
- Mealybugs: Cotton-like masses often found in leaf axils and on stems, causing stunted growth.
Regular inspections help you catch infestations early. Identifying these pests accurately allows for precise treatment methods, ensuring your Anthurium stays healthy and vibrant.
Isolate the Affected Plant
To prevent the spread of pests, you should immediately isolate the affected Anthurium plant from your other plants.
This allows you to monitor its health closely and manage any further infestations effectively.
Keep the plant in a separate location until you're certain it's pest-free.
Prevent Spread of Pests
Isolate your infested Anthurium immediately to prevent pests from spreading to other plants in your collection. This step is essential in securing the health of your entire plant collection.
Follow these steps to effectively isolate your plant:
- Move the Plant: Relocate the affected Anthurium to a quarantine area away from other plants. Make sure that this space has adequate light and ventilation.
- Inspect Surrounding Plants: Check nearby plants for any signs of infestation. Early detection can help in taking prompt action to prevent a widespread problem.
- Clean the Area: Thoroughly clean the original location of the infested plant. Wipe down surfaces with a mild disinfectant to eliminate any lingering pests or eggs.
Taking these steps will help you manage the situation effectively.
Monitor Plant Health
While your Anthurium is in isolation, carefully monitor its health for signs of recovery or further infestation. Check the leaves daily for new pests or damage. Look for discoloration, holes, or sticky residue, which indicate lingering issues. Use a magnifying glass to spot tiny insects like aphids or mites.
Guarantee the plant's environment remains best-suited—adequate light, humidity, and air circulation are essential. Water the Anthurium correctly, avoiding overwatering, which can stress the plant and worsen pest problems. Document any changes you observe, noting improvements or setbacks.
Regularly inspect the soil for pests or fungal growth. If you detect no further infestation after two weeks, gradually reintroduce the plant to its original location, continuing to monitor its health closely.
Natural Pest Remedies
Using natural pest remedies can effectively control infestations on your Anthurium plant without resorting to harmful chemicals.
Here are three reliable methods you can use:
- Neem Oil Spray: Mix one teaspoon of neem oil with one quart of water and a few drops of dish soap. Spray this mixture on affected leaves. Neem oil disrupts the life cycle of pests and is safe for your plant.
- Insecticidal Soap: Purchase or make your own by mixing liquid soap with water. Apply it directly to infested areas. This method suffocates pests without harming the plant.
- Diatomaceous Earth: Sprinkle food-grade diatomaceous earth around the base of the plant. This natural powder dehydrates and eliminates crawling insects effectively.
Chemical Treatment Options
Should natural remedies prove insufficient, chemical treatment options offer a more potent solution to eradicate pests infesting your Anthurium plant.
You can use insecticidal soaps or neem oil, which are generally safe for indoor plants. Apply these treatments directly to the affected leaves, ensuring thorough coverage.
For severe infestations, systemic insecticides like imidacloprid can be effective; they work by being absorbed into the plant tissue, providing long-lasting protection. Always follow the manufacturer's instructions for dosage and application frequency.
Remember, using chemical treatments requires caution. Protective gloves and masks are advisable to prevent skin irritation and inhalation of harmful substances.
Proper Leaf Cleaning
To clean the infested leaves effectively, you'll need to apply gentle cleaning techniques and suitable cleaning solutions.
Use a soft cloth or sponge dipped in lukewarm, soapy water to gently wipe each leaf.
After cleaning, make sure the leaves are thoroughly dried and inspected for any remaining pests.
Gentle Cleaning Techniques
Gently wiping the leaves with a damp, soft fabric effectively removes pests without damaging the delicate foliage of your Anthurium plant. This method maximizes the plant's health while avoiding harsh chemicals.
To achieve best results, follow these steps:
- Moisten your fabric: Use distilled water to avoid mineral buildup on the leaves.
- Wipe carefully: Gently clean both sides of each leaf, taking care not to tear or bruise the tissue.
- Inspect regularly: Conduct weekly checks to catch infestations early and address them promptly.
Maintaining cleanliness helps your Anthurium thrive, maximizing its freedom from pests.
Regular, gentle cleaning supports overall plant health and prevents future infestations, creating a vibrant and healthy environment for your plant.
Effective Cleaning Solutions
While gentle cleaning methods maintain your Anthurium plant pest-free, using efficient cleaning solutions guarantees thorough and best possible outcomes. Choose a blend of mild liquid soap and water, specifically one teaspoon of soap per quart of water. Apply this mixture with a soft cloth, ensuring uniform coverage on both sides of the leaves. This approach disrupts the exoskeleton of pests like aphids and spider mites without harming your plant.
Alternatively, you can use neem oil, diluted as per instructions, which serves as both a pesticide and a fungicide. Be sure to apply these solutions early in the morning or late in the afternoon to avoid leaf burn from the sun. Repeat weekly for optimal results.
Drying and Inspection
After applying your chosen cleaning solution, allow the leaves to air dry completely in a shaded area to prevent any potential damage from direct sunlight. This guarantees that the cleaning agents work effectively without causing leaf burn.
Once dry, inspect the leaves carefully for any remaining pests or damage.
Here's what you should look for:
- Visible Pests: Check for any remaining insects, especially on the undersides of leaves.
- Leaf Damage: Look for signs of distress, such as discoloration or holes, which may indicate persistent issues.
- New Growth: Ensure new leaves are healthy and free from pests to support ongoing plant importance.
Regular inspections help you catch issues early and maintain your Anthurium's health.
Pruning Infested Leaves
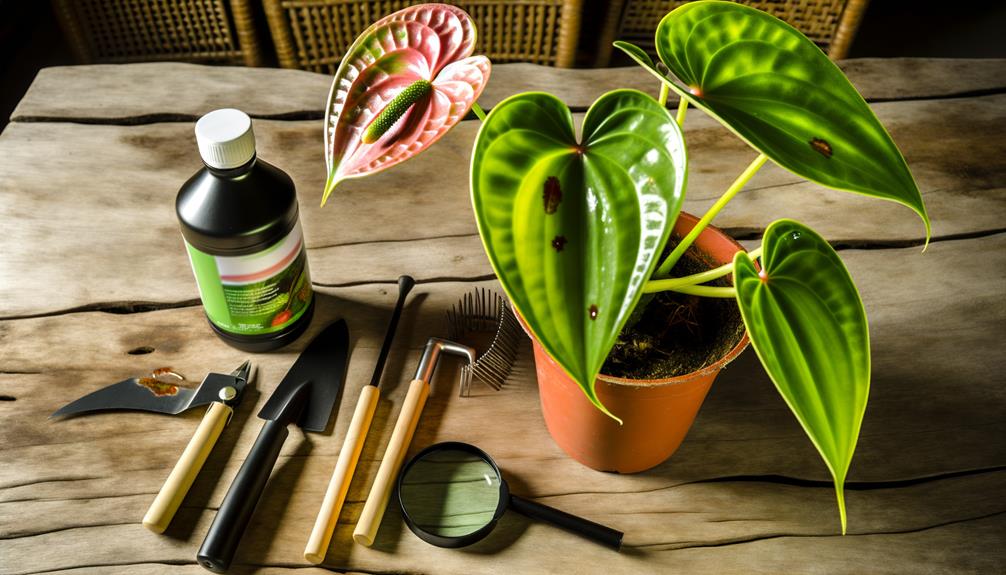
To effectively manage anthurium infestations, it's important to regularly prune leaves showing signs of pests. Use sterilized pruning shears to cut infected leaves at their base. Dispose of pruned leaves in sealed bags to prevent spreading. Pruning helps your plant redirect energy to healthier parts and reduces pest habitats. Focus on leaves with visible pests, discoloration, or damage.
Here's a quick guide:
| Step | Action | Purpose |
|---|---|---|
| Inspect | Check leaves for infestation | Identify affected areas |
| Sterilize Shears | Use alcohol to clean | Prevent disease transmission |
| Prune | Cut at leaf base | Remove infested leaves |
| Dispose | Seal in plastic bags | Contain and eliminate pests |
Enhancing Plant Immunity
Enhance your anthurium's natural defenses by ensuring it receives ideal nutrition and care. Properly nourishing your plant will bolster its immunity against pests and diseases. Focus on providing balanced fertilization, adequate watering, and best light conditions.
Here are three essential steps to strengthen your anthurium's immunity:
- Balanced Fertilization: Use a well-rounded, slow-release fertilizer to supply essential nutrients. Aim for a ratio like 3-1-2 (N-P-K) to support overall plant health.
- Adequate Watering: Water your anthurium consistently but avoid waterlogging. Allow the top inch of soil to dry out between waterings to prevent root rot.
- Best Light: Place your anthurium in bright, indirect light. Too much direct sunlight can scorch the leaves, while too little light can weaken the plant.
Preventing Future Infestations
By consistently monitoring your anthurium and maintaining impeccable hygiene practices, you can effectively prevent future infestations. Start by ensuring you regularly clean your plant's leaves with a damp cloth to remove dust and potential pests. Use sterilized tools for pruning to avoid introducing pathogens.
Maintain proper air circulation around the plant to reduce humidity, which pests thrive in. Quarantine new plants for a few weeks before introducing them to your collection. Inspect your anthurium frequently for early signs of pests and take immediate action if necessary.
Additionally, use neem oil or insecticidal soap as a preventive measure against common pests. Implementing these practices will markedly reduce the likelihood of future infestations and promote healthier plant growth.
Monitoring Plant Health
Regularly monitoring your anthurium's health is vital to catching any issues early and guaranteeing the plant thrives. Consistent observation allows you to identify and address problems before they escalate.
Here are three essential steps to keep your anthurium in top condition:
- Inspect Leaves and Stems: Look for signs of pests, discoloration, or deformities. Use a magnifying glass for a closer examination.
- Check Soil Moisture: Make sure the soil is consistently moist but not waterlogged. Overwatering can lead to root rot and other problems.
- Monitor Light and Temperature: Ensure your anthurium receives bright, indirect light and maintains a stable temperature between 60-80°F.
Conclusion
To sum up, your diligence in treating infested new leaves on your anthurium can yield lush, vibrant growth. By identifying pests, isolating affected plants, and employing both natural and chemical remedies, you'll nip the problem in the bud.
Pruning and boosting plant immunity are your frontline defenses. Preventing future infestations and consistently monitoring your plant's health will guarantee your anthurium thrives, turning your care into a flourishing masterpiece.
Remember, a stitch in time saves nine.