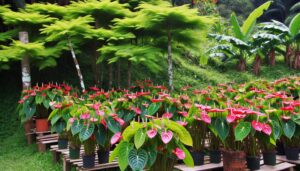
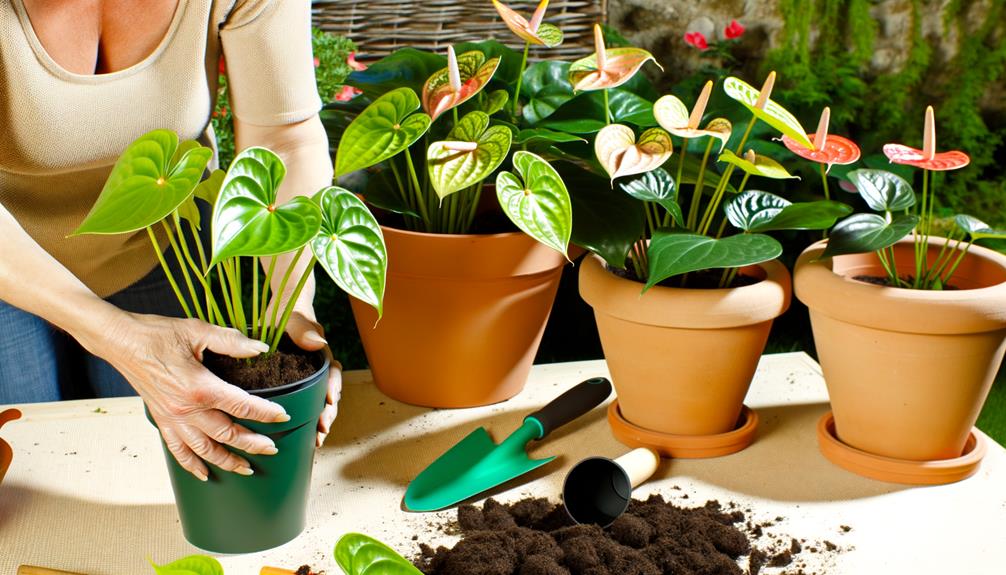
Planting Anthuriums: Choosing the Right Pot Size in 10 Steps
Planting Anthuriums correctly starts with understanding their epiphytic roots. Choose a well-draining potting mix of orchid bark, perlite, and peat moss.
Assess the root spread and select a pot 2-3 inches wider than the root ball. Consider the plant's growth potential and future dimensions.
Opt for breathable materials like terracotta or plastic. Guarantee excellent drainage by using pots with holes and adding a gravel layer.
Avoid overpotting; select a pot slightly larger than the root ball. Repot every 1-2 years, trim any dead roots, and monitor plant health.
Follow these steps to give your Anthurium the best growing conditions possible.
Key Takeaways
- Select a pot 1-2 inches wider in diameter than the current root ball for optimal root space.
- Use a well-draining potting mix with orchid bark, perlite, and peat moss to prevent root rot.
- Ensure the pot has drainage holes and add a gravel layer to enhance water movement and prevent blockage.
- Repot every 1-2 years, increasing pot size slightly and trimming dead or rotted roots for healthy growth.
- Avoid overpotting by choosing a pot only slightly larger than the root ball and maintaining proper soil moisture levels.
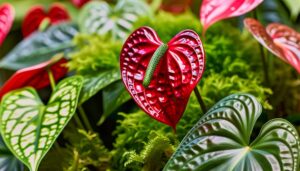
Understand Anthurium Roots
Anthurium roots are epiphytic, meaning they naturally grow on other plants or surfaces, allowing for efficient water and nutrient absorption.
To care for these roots, make sure your potting medium mimics their natural habitat. Use a blend of orchid bark, perlite, and peat moss to create a well-draining mix. Avoid compact soils as they can suffocate the roots, leading to rot.
When you water, soak the medium thoroughly but let it dry out between waterings. You should maintain a balance of moisture and air because their roots need oxygen to thrive.
Regularly check for root health by gently lifting the plant and inspecting for firm, white roots. Proper understanding of these roots will guarantee your Anthurium remains healthy and vigorous.
Assess Plant Size
To assess your Anthurium's size, start by examining the current root spread to guarantee the roots have room to grow without becoming root-bound.
Next, check the foliage density to determine if the plant's leaves are overcrowded, which could indicate the need for a larger pot.
Current Root Spread
Evaluating the current root spread is vital for determining the appropriate pot size, ensuring your Anthurium's roots have ample space to grow without becoming root-bound.
Start by gently removing the Anthurium from its existing pot. Examine the root system closely; healthy roots should be white and firm. Measure the root ball's diameter and depth. If roots are tightly coiled or circling the pot, it's an indicator that a larger pot is needed.
Select a pot that's 2-3 inches wider in diameter than the current root ball. This allows for adequate root expansion and nutrient absorption while preventing waterlogging. Proper root space is essential for maintaining your Anthurium's overall health and promoting vigorous growth.
Foliage Density Check
When evaluating foliage density, closely examine the overall size and fullness of the plant to make certain it complements the chosen pot size. Start by counting the number of leaves and appraising their distribution. Look for a balanced arrangement where leaves aren't overcrowded.
Measure the leaf span horizontally to confirm it doesn't exceed the pot's diameter substantially. Check for leaf health—vibrant, firm leaves indicate a well-adjusted plant. Observe the stem structure; it should support the foliage without appearing strained.
If the foliage is dense but the pot is small, roots may be cramped, leading to stress. Matching the plant's aerial parts with the pot size prevents nutrient competition and promotes healthy growth.
Growth Rate Analysis
Understanding your Anthurium's growth speed is crucial for determining the appropriate pot size, ensuring the plant has enough space to expand its root system and aerial parts harmoniously.
Begin by evaluating the current size and health of your Anthurium. Monitor the frequency of new leaf emergence and root growth. A rapid growth speed will require a larger pot to accommodate the expanding root system, while a slower growth speed might allow for a smaller pot.
Consider these factors:
- Root Bound Symptoms: Check for roots circling the pot or protruding from drainage holes.
- Leaf Production: Count new leaves appearing monthly.
- Stem Elongation: Measure increases in stem length.
- Overall Healthiness: Assess the plant's general health and energy.
Consider Growth Potential
When selecting a pot size for your Anthurium, you need to anticipate root expansion and future plant dimensions. Guarantee the pot allows adequate space for the roots to grow without becoming root-bound, which can hinder nutrient absorption.
Opt for a pot that accommodates the plant's projected growth, considering its potential height and width.
Anticipate Root Expansion
To assure your anthurium thrives, it's important to anticipate root expansion by selecting a pot size that accommodates future growth potential. Roots need ample space to absorb nutrients and water efficiently. If the pot is too small, roots can become bound, restricting growth and causing stress.
Consider these factors when choosing a pot size:
- Root Ball Size: Measure the current root ball and ensure the new pot is 1-2 inches larger in diameter.
- Drainage Requirements: Assure the pot has adequate drainage holes to prevent waterlogging.
- Soil Aeration: Use a well-aerated mix to promote healthy root respiration.
- Growth Rate: Evaluate the anthurium's growth rate; faster-growing plants need more frequent repotting.
Following these guidelines ensures your anthurium has the optimal environment to flourish.
Future Plant Dimensions
Considering the growth potential of your anthurium, account for the plant's mature size to guarantee the chosen pot can support its future dimensions. Start by researching the typical mature height and spread of your specific anthurium species.
Anthuriums can grow up to 3 feet tall with a similar spread in ideal conditions. Select a pot that allows for this expansion without crowding the roots. Aim for a pot diameter that's 2-3 inches larger than the current root ball diameter. This secures adequate root growth and stability.
Additionally, consider the plant's vigor; vigorous growers will need repotting more frequently. Make sure the pot has proper drainage to prevent root rot, which can inhibit healthy growth and compromise the plant's future dimensions.
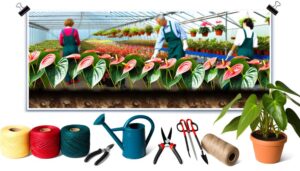
Choose Pot Material
Selecting the appropriate pot material for your anthuriums impacts their root health and overall growth. You need to take into account factors such as drainage, aeration, and insulation.
Different materials offer unique benefits and challenges:
- Clay Pots: Porous, allowing roots to breathe but can dry out quickly.
- Plastic Pots: Retain moisture well, lightweight, but may cause poor aeration.
- Ceramic Pots: Provide stability and insulation, but make sure they have drainage holes.
- Wooden Pots: Offer natural insulation and aesthetics but can deteriorate over time.
Understanding these materials helps you make an informed choice. For the best growth, make sure the pot material complements the watering and light conditions required by anthuriums. Your decision directly impacts the plant's ability to absorb nutrients and maintain healthy roots.
Measure Pot Diameter
To measure the pot diameter, use a ruler or measuring tape across the widest part of the pot's opening.
The ideal pot size should be 1-2 inches larger in diameter than the current root ball to accommodate growth.
Ensuring the right pot diameter supports essential root expansion and overall plant health.
Ideal Pot Size
When selecting the ideal pot size for your anthuriums, measure the diameter of the pot to guarantee it provides sufficient space for root growth and prevents both overcrowding and excessive soil moisture.
A pot that's too small can restrict root expansion, leading to stunted growth and poor nutrient uptake. Conversely, an oversized pot retains excess water, increasing the risk of root rot. Aim for a pot with a diameter that's 1-2 inches larger than the plant's current root ball.
Verify the pot has drainage holes to prevent waterlogging.
Use a pot made of breathable material like terracotta for better aeration.
Opt for a pot depth that matches the root ball height.
Avoid pots with narrow openings, which can hinder root spread.
Plant Growth Needs
Understanding the plant growth requirements of anthuriums involves measuring the pot diameter to guarantee it accommodates the root system's expansion adequately.
First, examine the root ball's current size. Measure its diameter at the widest point. The new pot should have a diameter 2-3 inches greater than the root ball to provide ample space for growth. This increase promotes healthy root development and prevents root-bound conditions.
Next, make sure the pot has drainage holes to prevent waterlogging, essential for anthurium's oxygen needs. Select a material that retains moisture yet offers breathability, like terracotta or plastic with sufficient aeration.
Check Pot Depth
Verify the pot's depth is sufficient for anthurium roots to spread and develop without becoming cramped. Measure the pot to confirm it provides at least 6-8 inches of depth. This allows the roots to grow properly and supports the plant's overall health. Shallow pots can restrict root expansion and lead to poor nutrient uptake.
Root Ball Size: Confirm the pot accommodates the root ball with extra space for growth.
Growth Rate: Consider the anthurium's growth rate. Faster growing plants may need more depth.
Soil Aeration: Deeper pots enhance soil aeration, preventing root rot.
Stability: A deeper pot provides stability, reducing the risk of the plant tipping over.
Accurate pot depth is critical to sustain anthurium essentiality and longevity.
Ensure Proper Drainage
To maintain healthy anthuriums, make certain the pot has adequate drainage holes to prevent waterlogging and root rot. Waterlogged soil suffocates roots, hindering oxygen uptake, and promotes fungal growth. Use a potting mix rich in organic matter like peat and perlite to enhance drainage. Here's a guide on ensuring proper drainage:
| Step | Action | Purpose |
|---|---|---|
| 1 | Check pot holes | Confirm water exits |
| 2 | Add gravel layer | Prevent blockage |
| 3 | Use well-aerated mix | Promote root vitality |
| 4 | Avoid compacted soil | Enhance water movement |
| 5 | Elevate pot | Facilitate drainage |
Avoid Overpotting
Despite the temptation to give your anthurium more room to grow, overpotting can lead to root rot due to the excessive soil retaining too much moisture. When roots sit in overly wet conditions, they can suffocate and begin to decay.
To prevent this:
- Select a pot that's only 1-2 inches larger in diameter than the current one.
- Ensure the soil is well-draining to avoid water accumulation.
- Monitor moisture levels by feeling the top inch of soil; it should be slightly dry before watering.
- Use a pot with drainage holes to allow excess water to escape.
These steps will help your anthurium maintain peak health, promoting robust root development without the risks associated with overpotting.
Repotting Frequency
Repot your anthuriums every 1-2 years to ensure they have ample space for healthy root growth and nutrient absorption. Use a pot that's 1-2 inches larger in diameter than the current one. This secures the roots have room to expand without becoming root-bound, a condition where roots encircle the pot, limiting nutrient uptake.
Gently remove the plant from its current pot, shaking off excess soil to examine the roots. Trim any dead or rotted roots with sterilized scissors. Place the anthurium in the new pot, adding fresh, well-draining soil rich in organic matter. Water it thoroughly, allowing excess water to drain.
Consistent repotting prevents nutrient deficiencies and supports vigorous growth, resulting in a healthier, more vibrant anthurium.
Monitor Plant Health
Regularly examining your anthurium for signs of stress or disease promotes early detection and prompt intervention, maintaining its overall health and vibrancy. Begin by inspecting the leaves for discoloration, wilting, or unusual spots. These symptoms can indicate nutrient deficiencies, overwatering, or pest infestations.
Check the roots for rot, which often manifests as a foul odor or mushy texture. Confirm the potting mix remains well-draining to prevent waterlogged conditions.
- Leaves: Look for yellowing, browning, or black spots.
- Roots: Check for a healthy white color and firmness.
- Stem: Examine for any signs of softening or fungal growth.
- Soil: Make sure it's neither too dry nor overly saturated.
Consistent monitoring allows you to address issues before they escalate, securing your anthurium thrives.
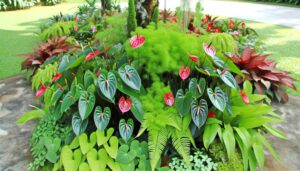
Conclusion
You've now become the gardener, nurturing the delicate dance of roots and soil. By selecting the right pot size, you're giving your anthurium the perfect stage to flourish. Remember, the pot is more than a vessel—it's a cradle for growth. It symbolizes your commitment to vibrant life.
Monitor the plant's health, be vigilant about drainage, and avoid overpotting. In this botanical symphony, every detail counts. Your anthurium will thank you with its radiant blooms.